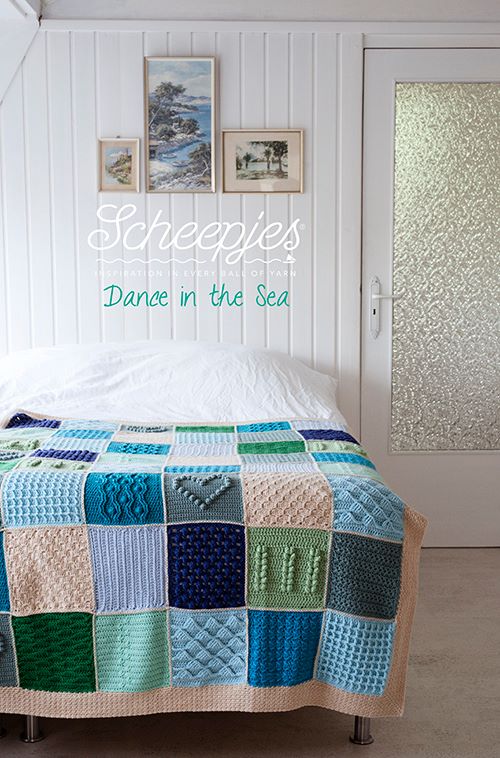
I am quite bad at keeping secrets… I mean I do keep them of course, but it takes me so much inner energy and concentration not to tell something I shouldn’t… And when it’s the time to finally break silence – I am always so excited and happy. Like today for example, as I can finally tell you about an upcoming Scheepjes CAL 2016. It was announced a week ago following with a few sneak peeks and a big reveal of a wonderful, gorgeous blanket. This CAL (crochet-a-long) is not just a very beautiful and fun project to make, but it also has a story behind…
This CAL is dedicated to memory of Marinke Slump (Wink) – a talented crochet designer behind A creative being, who tragically passed away last summer. Marinke had been suffering from depression and lost in this battle... Last summer she was working on a new design which was meant to be a new CAL, but it was not finished. Her death became a tragic news for her family, friends and lots and lots of fans who admired (and admire) her work.
With a permission of Marinke’s family Scheepjes decided to finish her design using Wink’s sketches, samples and colour mood boards. Being a part of a Scheepjes Bloggers Group I was also invited to take part in this sensitive project full of feelings, love and care. Each designer created one square block which were joined together in a blanket called Last Dance on the Beach. And this blanket is devoted to the memory of Wink and as a tribute to her creative work.
Unfortunately I didn't get a chance to get acquainted with Marinke in person. But I believe that joining this CAL will help me to connect with her in some way...
This CAL will begin on April 20th and will last for 14 week. Every week a new square will be introduced and each designer will provide help and support for her design in Facebook groups, created especially for the needs of the CAL. Thousands of people have already joined them and continue to join every day. If you would like to be a part of this CAL – please, also check them. There is international group (with English language - HERE) and a separate group for Dutch speaking crafters HERE.
Update: you can download the patterns for each week HERE.
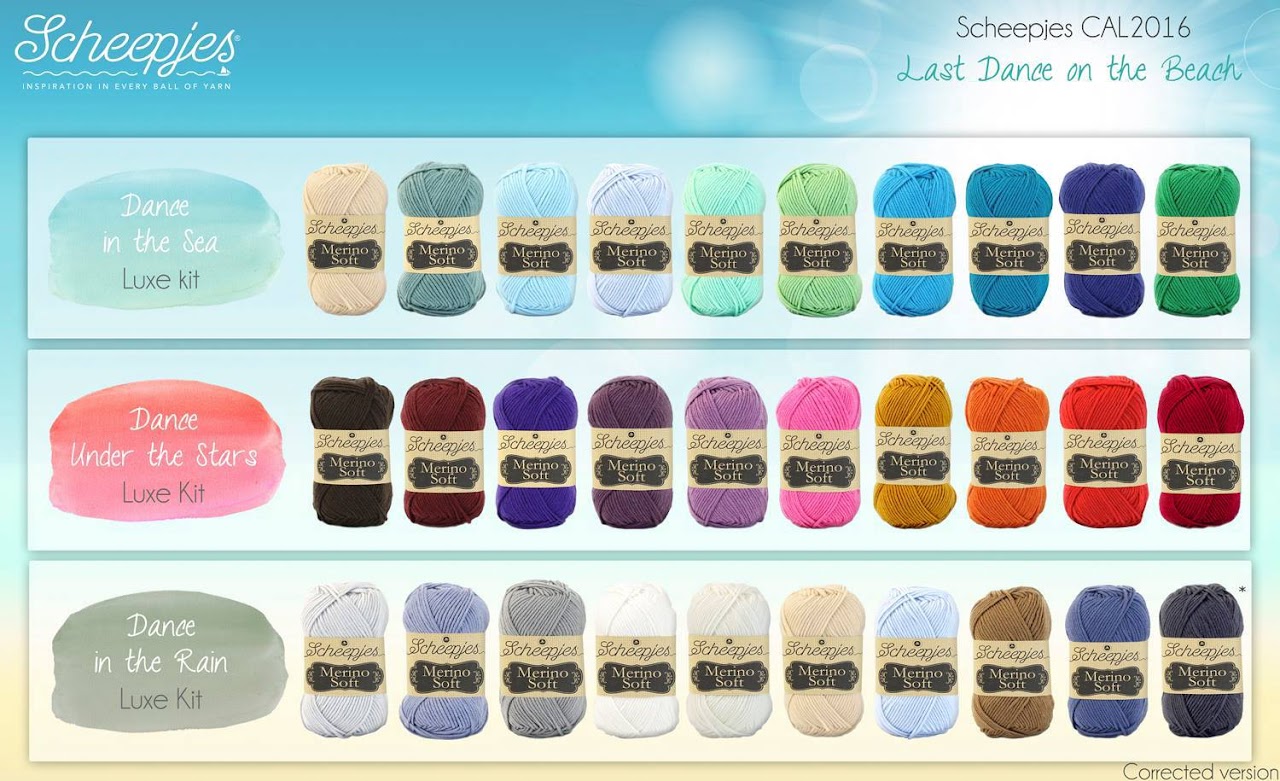
There are three different themes (colorways) offered for Last Dance on the Beach Blanket – Dance in the Sea, Dance in the Rain and Dance Under the Stars. And all three colorways will be available in so called basic and lux kits.
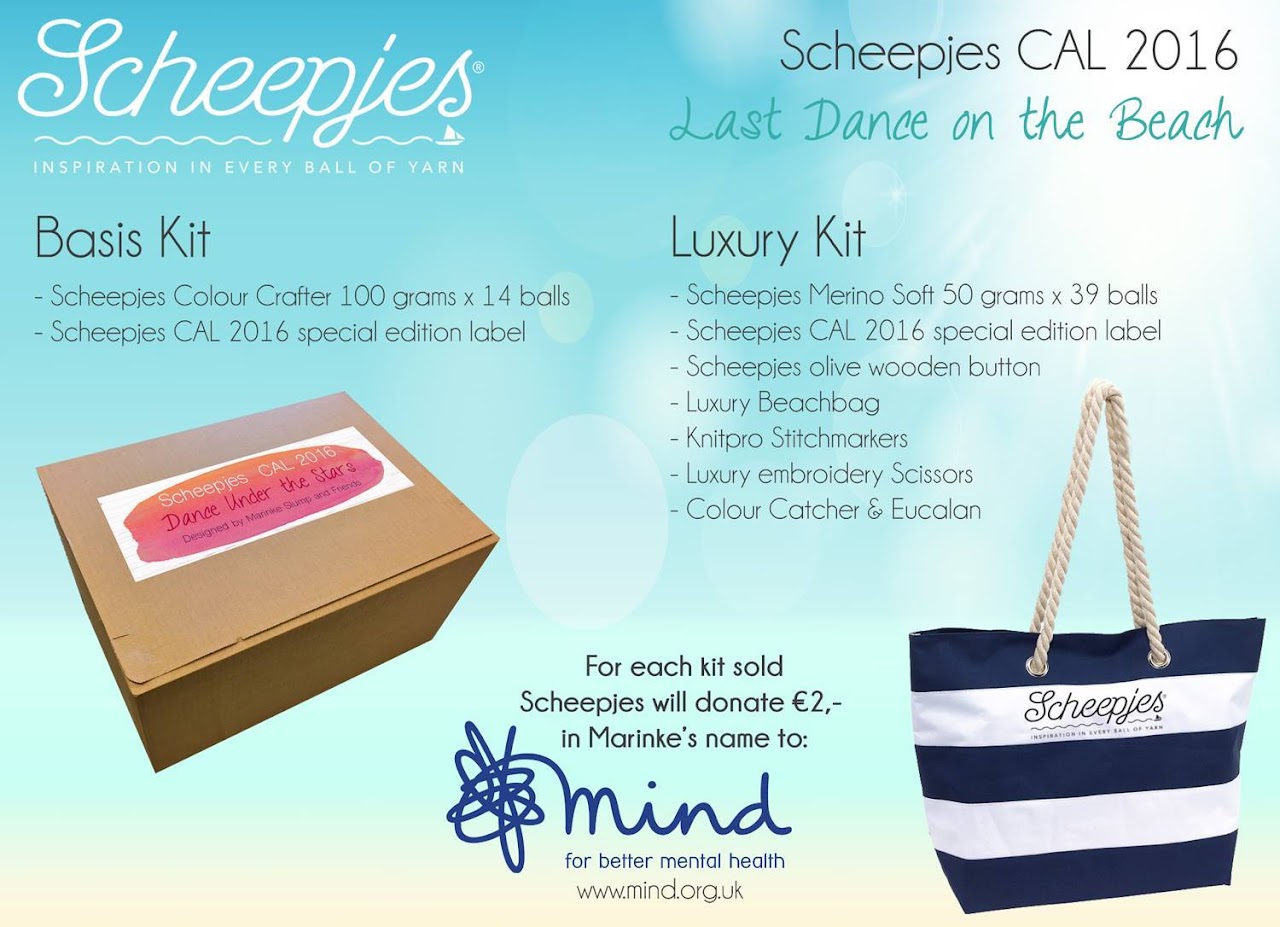
Basic kit is made up of 14 skeins of premium acrylic yarn Colour Crafter and its price is £33.99 / €43,40.
Lux kit contains 39 balls of luxury Merino Soft yarn, Scheepjes olive wooden button, luxury beach bag, Knit Pro stitch markers, embroidery scissors, colour catcher and eucalon. Lux kits will cost £119.99 / €159,90.
Both kits include a €2 charitable donation to Mind in Wink's name. This donation will be paid for each sold kit. But if you would like to use other Shceepjes yarns for this CAL (for example, cotton or cotton blend) you can send donation yourself, if you wish.
Here are the dimensions of the blankets made with both kits. Maybe they will also help you to decide:
Basic kit: 115 cm x 150 cm
45.2 inches x 59.5 inches
3 ft 9 inches x 4ft 11 inches
Lux kit: 130cm x 160 cm
51.1 inches x 62.9 inches
4ft 3 inches x 5ft 2 inches
Kits will be available for purchase on 1st of April (this Friday) HERE on Deramores*, HERE on Wool Warehouse* (both retailers ship internationally), via all Scheepjes stockists, and on Paradise Fibers* (US). There are only 3 weeks left before the CAL begins, so it’s the right time to have a look at yarns, colour charts and decide which kit is right for you. So that you get your yarn on time.
I will also join this CAL and make my own blanket. I was hesitating if I should choose basic or lux kit, but finally decided to go for Merino Soft. If you haven’t tried any of these yarns, maybe my reviews can help you a bit. You can read about Colour Crafter HERE and my own opinion about Merino Soft is HERE.
I decided to use Merino Soft mostly because I already have one blanket (Birthday in Malmö) made with Colour Crafter. This is not ordinary acrylic yarn, it is very soft and if you are not fond of artificial fibres in general, maybe this yarn will help you to change your point of view. Colour Crafter has several advantages and one of them is lower price (in comparison with lux kit), but it doesn’t mean at all that your finished blanket will look cheap. I’ve made one for myself and I am very happy with it.
I still haven’t decided which exactly colours I want to use, as I am truly in love with all of them. This is not an easy choice, indeed. But Dance in the Rain seems to fit interior of my living room the best… But who knows, maybe I will change my mind.
Please, use hashtags #ScheepjesCAL2016, #LastDanceOnTheBeach and #LDOTB for marking your projects on social media. And if you have a Ravelry account, don’t forget to add this project to your Ravelry Queue.
I can’t wait to order yarn and start crocheting!! This will be my first CAL, can you imagine? I will post about my progress regularly, so see you soon!
You can subscribe to my Newsletter not to miss a single post, pattern and tutorial. And you can also follow me on Facebook, Pinterest and Instagram.

*This blog post contains affiliate links. Thanks for your support!
7 Comments
Categories:
Colour Crafter,
free pattern,
Last Dance on the Beach,
Marinke,
Merino Soft,
Scheepjes CAL 2016
Today is a very happy day and I am honored to host Crochetville Blog Tour 2016. This Tour is a celebration of March as a National Crochet Month. You have probably visited lots of different blogs already and I hope you are having fun. But if you haven’t heard anything about this Tour yet – don’t worry. It is still not late to join it. You can find all the information about this wonderful event HERE. and please, be sure to read my short interview HERE. :)
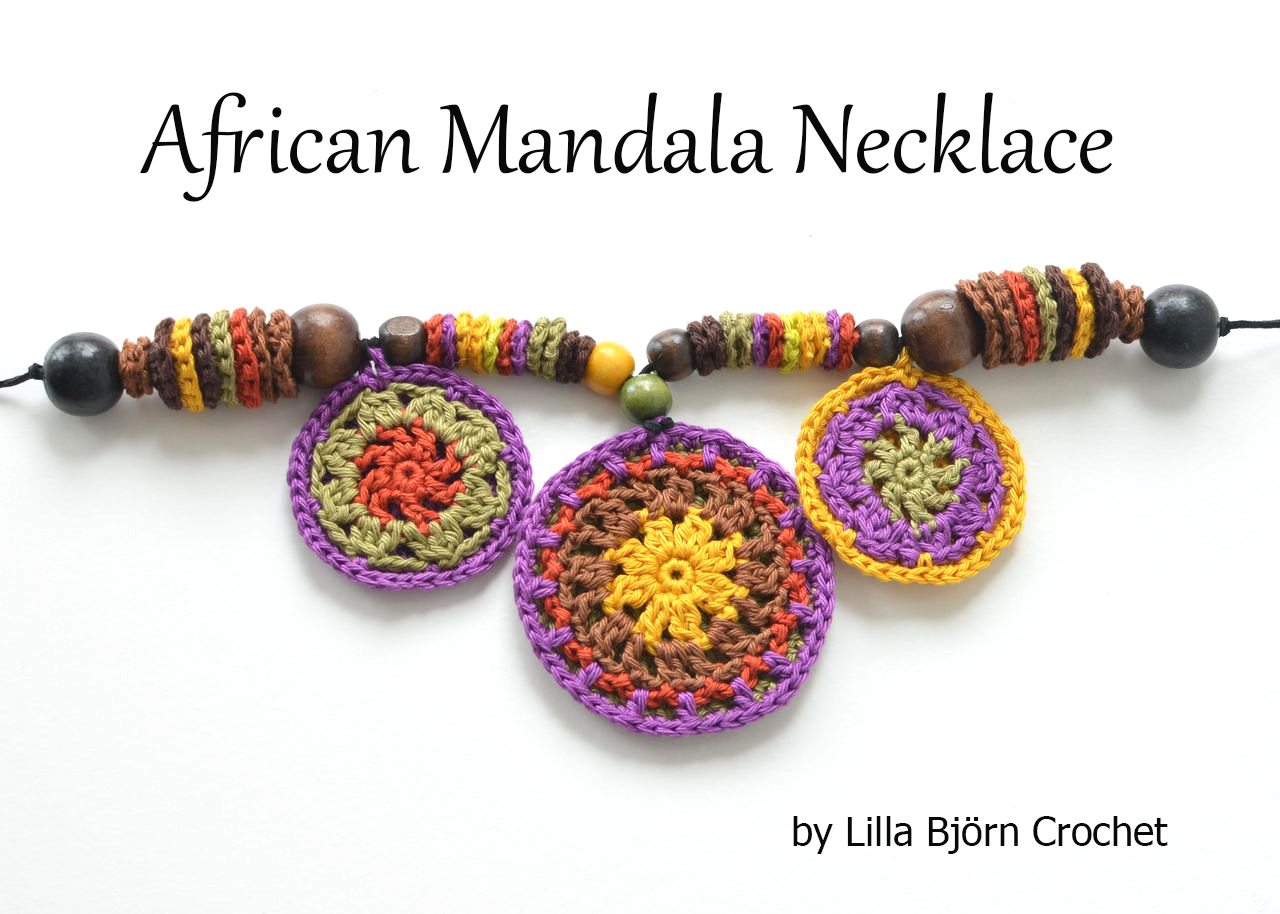
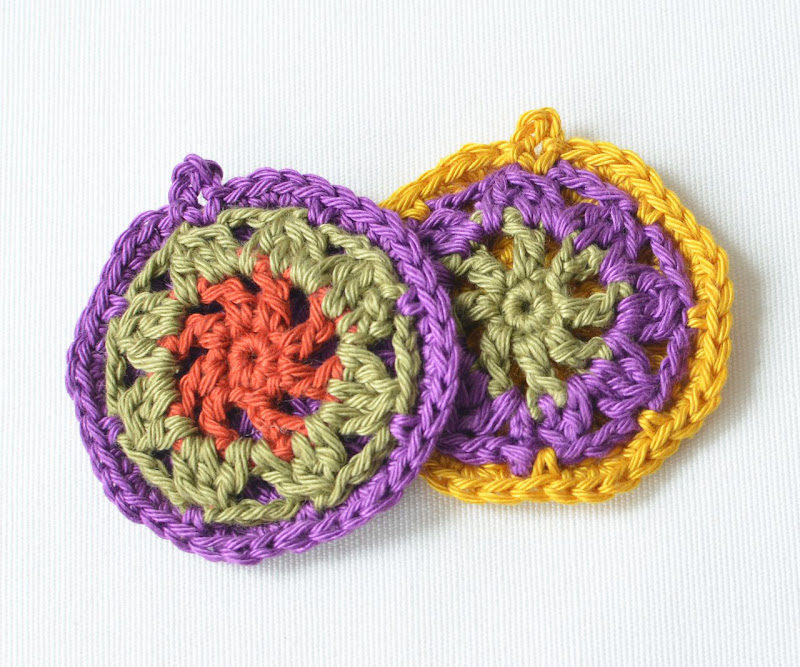
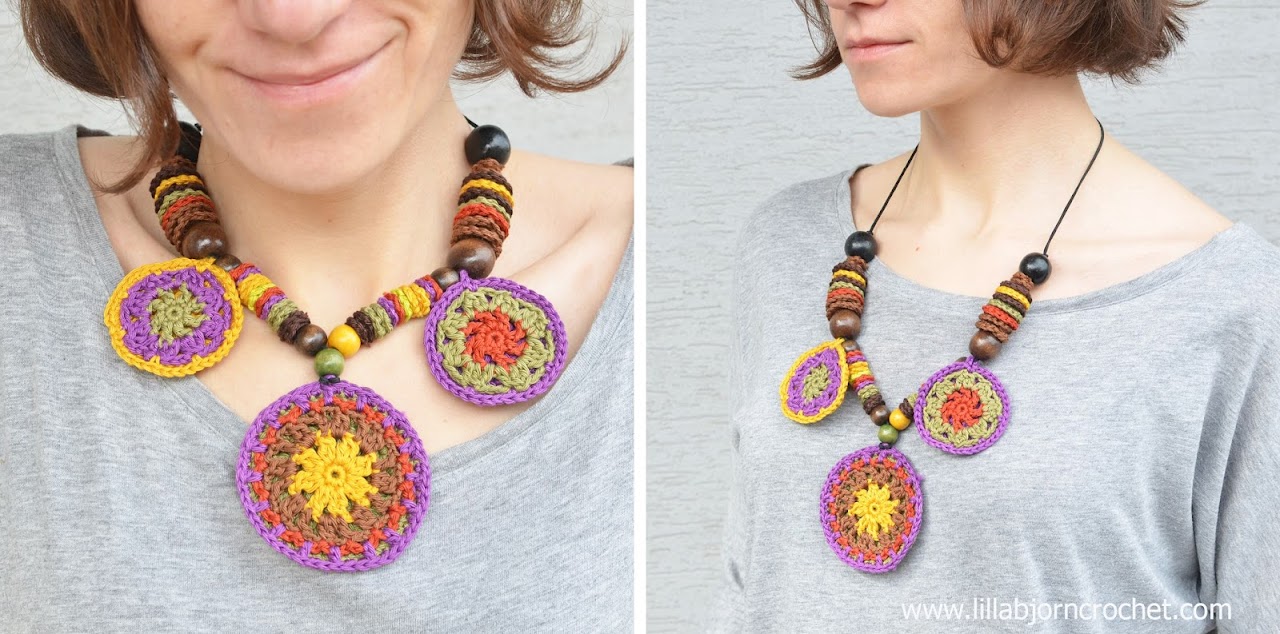
As a part of celebration I’ve designed a Mandala Necklace in African style. It is bright, happy and easy to make. And its FREE pattern is available HERE. I would also like to share a coupon code for 25% discount on one entire purchase in my Ravelry pattern shop. The code LillaBlogTour will be valid through the end of this month (March 31). Check my Ravelry store HERE and choose the patterns you like!
Have fun! And don’t forget to subscribe to my Newsletter not to miss a single post. And you can also follow me on Facebook, Pinterest and Instagram.

Affiliate link:

As a part of celebration I’ve designed a Mandala Necklace in African style. It is bright, happy and easy to make. And its FREE pattern is available HERE. I would also like to share a coupon code for 25% discount on one entire purchase in my Ravelry pattern shop. The code LillaBlogTour will be valid through the end of this month (March 31). Check my Ravelry store HERE and choose the patterns you like!
Have fun! And don’t forget to subscribe to my Newsletter not to miss a single post. And you can also follow me on Facebook, Pinterest and Instagram.

Affiliate link:

Are you a type of person who likes to wear bright and extraordinary jewelry? To be honest I am not so brave. But I will definitely wear this African Mandala Necklace often this spring and summer. We need to do something about our inner fears, right? And we should not be afraid of looking bright and happy! This pattern is FREE and you can check more pictures of finished necklace HERE.
You will need:
- Leftovers of Fingering/Sport cotton yarn in different shades. I used Catona by Scheepjes in shades 208, 395, 282, 388, 157, 162 with a tiny accent of 245.
- Crochet hook Clover Soft Touch* 2.5mm (C)
- Scissors and tapestry needle to weave yarn tails in.
Level. Beginner
Size. The size of finished mandalas will depend on yarn and hook you choose and also on your personal gauge. My mandalas are approx. 5cm (2in) and 7cm (3in) large.
Stitch guide and Abbreviations
US standard abbreviations are used in this pattern. But if you are used to other terms, please check this Crochet Translation Project which might be helpful in translation to your native language.
st(s) - stitch(es)
ch - chain
sp(s) - space(s)
yo - yarn over
*…* *crochet following directions* as many times as indicated
sl st (slip stitch) – insert hook in indicated st, yo, draw yarn up and pull 2nd lp through the 1st lp on hook.
sc (single crochet) – insert hook in indicated stitch, yo, draw up a lp, yo and pull through both lps on hook.
dc (double crochet) – yo, insert hook in indicated st, yo, draw up a lp, *yo, pull through 2 lps* twice.
dc2tog (double crochet 2 together) - *yo, insert hook in indicated st, yo, draw up a lp, yo, pull through 2 lps* twice in same st, yo, pull through all 3 lps on hook.
dc3tog (double crochet 3 together) - *yo, insert hook in indicated st, yo, draw up a lp, yo, pull through 2 lps* 3 times, yo, pull through all 4 lps on hook.
NJ - "needle join" (or invisible join). See tutorial HERE.
Copyright LillaBjornCrochet 2016. All rights reserved. This pattern is for unlimited personal use only. Do not reproduce or sell the pattern. The pattern may not be copied in any way (print or digitally), in part or in full. Items may be sold that are made from this pattern as long as the designer is credited. Shop owners, if you wish to make a kit with yarn using this pattern, please request permission and copyright details from me before offering any kits for sale. Please, read Copyright page for more information.
Instructions
Add this Pattern to your Ravelry QueueColour key: C1 - shade 395, C2 - shade 282, C3 - shade 208, C4 - shade 388, C5 - shade 157
Small Mandala - front part
Rnd 1. Start with C1. Make magic ring. Ch1 (doesn't count as 1st sc), 8sc into ring, join with sl st in 1st sc after ch1. Don't fasten off. (8 sc)
Rnd 2. Continue with yarn C1. Ch5 (counts as 1st dc and ch2), *1dc in next st, ch2* 7 times; join with sl st in 3rd ch, fasten off. (8 dc + 8 ch2-sps)
Rnd 3. Change to yarn C2. Attach yarn by pulling a loop in any ch2-sp. Note: 1st dc3tog is ch2+dc2tog. While making every dc3tog: work 1st leg in same ch2-sp, work 2nd leg in next dc, work 3rd leg in next ch2-sp.
Ch2 and dc2tog (make 1st leg in next dc, make 2nd leg in next ch2-sp), ch3, *dc3tog, ch3* 7 times; join with sl st in 1st dc2tog, fasten off. (8 dc3tog's + 8 ch3-sps) Weave tails in.
Small Mandala - back part
Rnd 1. With yarn C3. Make magic ring. Ch1 (doesn't count as 1st sc), 8sc into ring, join with sl st in 1st sc after ch1. Don't fasten off. (8 sc)
Rnd 2. Ch2 (doesn't count as 1st dc), *2dc in next st* 8 times, join with sl st in 1st dc after ch2. (16 dc)
Rnd 3. Ch2 (doesn't count as 1st dc), *2dc in next st* 16 times, join with sl st in 1st dc after ch2. Don't fasten off! (32 dc)
Small Mandala - joining
Place front and back parts of mandala facing with wrong sides together. *Insert the hook in any dc3tog on front part and in 1st sc after a loop on the back part, 1sc, (sc, 2sc in next st, sc) on back part only; repeat from * 6 more times. Make (sl st, ch4, sl st) in next dc3tog (through both layers), (sc, 2sc in next st, sc) in back part only. Join with sl st in 1st sc of the rnd. Fasten off. Weave tails in.
One small mandala is now finished! Make another one using C4 and C1 for front and C2 for back.
Large mandala - front part
Rnd 1. Start with C3. Make magic ring. Ch1 (doesn't count as 1st sc), 8sc into ring, join with sl st in 1st sc after ch1. Don't fasten off. (8 sc)
Rnd 2. Continue with yarn C3. Note: 1st dc2tog is ch2 + dc in next st. Both legs of the rest dc2tog's are made in same st.
*dc2tog in next st, ch2* 8 times; join with sl st in 1st dc2tog, fasten off. (8 dc2tog's + 8 ch2-sps)
Rnd 3. Change to yarn C5. Attach yarn by pulling a loop through any dc2tog.
ch4 (counts as dc+ch2), dc2tog in next ch2-sp, ch2, *dc in next dc2tog, ch2, dc2tog in next ch2-sp, ch2* 7 times; join with sl st in 2nd ch of ch4 in the beginning of the rnd, fasten off. (8 dc + 8 dc2tog + 16 ch2-sps)
Rnd 4. Change to yarn C4. Attach yarn by pulling a loop through any dc2tog.
ch4 (count as sl st+ch3), sk ch2-sp, sl st in next st, *ch3, sk ch2-sp, sl st in next st*15 times; last sl st is made in same st where yarn was attached, fasten off. (16 sl sts + 16 ch2-sps) Weave tails in.
Large mandala - back part
Rnds 1-3. With yarn C1. Repeat rnds 1-3 for the back of small mandala. Don't fasten off.
Rnd 4. Ch2 (doesn't count as 1st dc), *dc in next st, 2dc in next st* 16 times, NJ in 2nd dc after ch2. Fasten off! (48 dc)
Large Mandala - joining
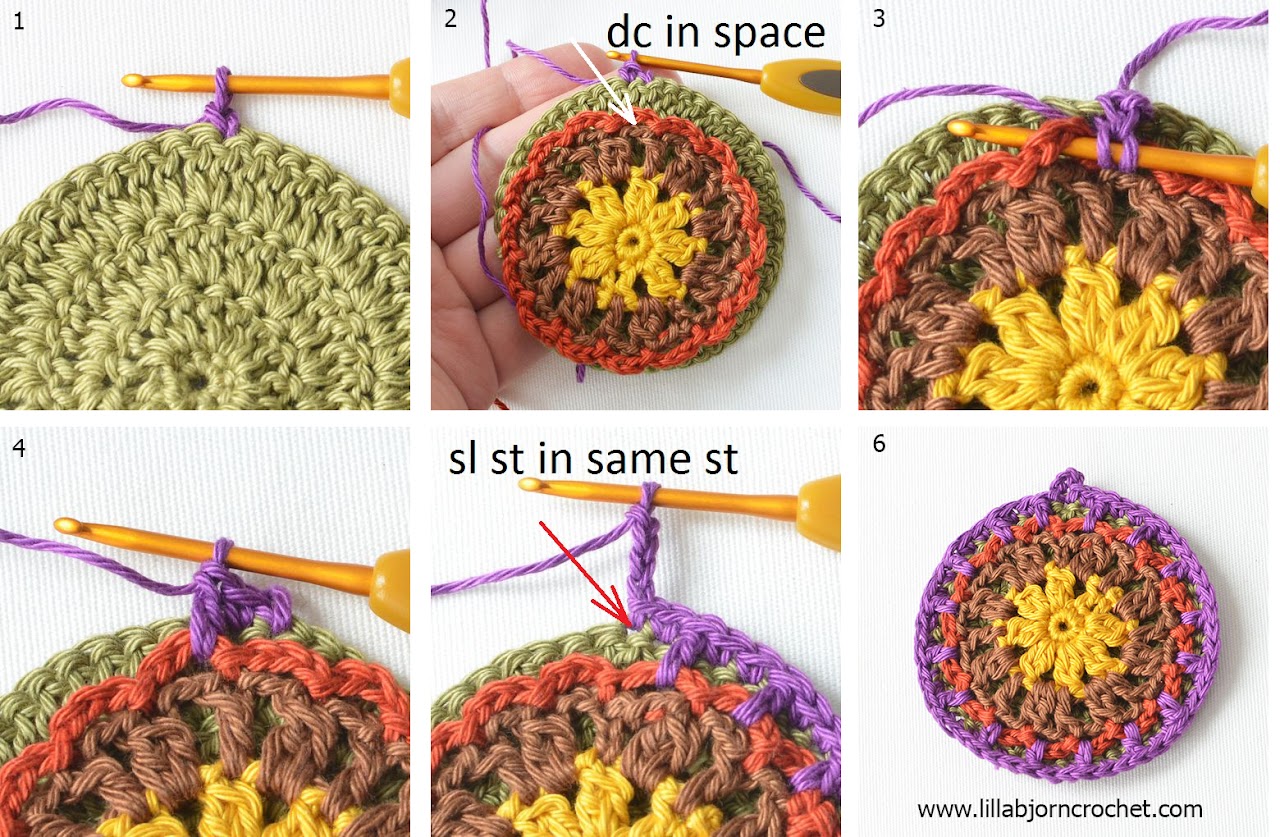
Pull a loop of yarn C2 through any st of back part on the wrong side, make ch1 (counts as 1st sc). Place front and back parts of mandala facing with wrong sides together.
1dc in any ch2-sp of front part, *sk 1 st on back part, 1sc in each of 2 next sts on back part, 1dc in next ch2-sp on front part* 15 times, sk 1 st on back part, (sl st, ch4, sl st) in next st on back part. NJ in 1st dc of the rnd. Fasten off. Weave tails in.
Colorful circles
Make as many colorful circles as you wish. I made 26 small circles and 14 large circles in total.Small circle: Make magic ring. Ch1 (counts as 1st sc), 7sc into ring, NJ in 1st sc after ch1. Fasten off. (8 sc)
Large circle: Make magic ring. Ch2 (counts as 1st dc), 15dc into ring, NJ in 1st dc after ch2. Fasten off. (16 dc)
Weave all yarn tails in.
Putting Necklace Together
First attach central large madnala to the cord through a loop. Then pull both tails of the cord through 1 small bead, add 1 more small bead to each tail separately.On each tail put: 11 small circles of different colors, 1 small bead, 1 small mandala (secure it with a knot as pictured below), 1 big bead, 7 large colorful circles, 2 small colorful circles, 1 big bead. Make a knot. 

Congratulations!! Your new Mandala necklace in African style is now finished! (I hope you like it and will be happy to see the pictures of your necklace in my official Ravelry group HERE!)
Don't forget to subscribe to my Newsletter not to miss a single post. And you can also follow me on Facebook, Pinterest and Instagram.

*This blog post contains affiliate links. Thanks for your support!
I am dying to show you my new finished crochet project. I posted a very modest sneak peeks last week. You could probably guess from the pictures it was about crocheted jewelry. But still I hope the mystery was kept safe, and today’s reveal will be a kind of surprise for you! So here it is! A mandala necklace.

I have never been to Africa or Mexico, but every time I saw necklaces from these parts of the world, I was inspired so much! And wanted to create something like this myself. I am not sure which style my new necklace can be put to. But it probably doesn’t matter. I was longing for the sun, and spring. And while making all those tiny colorful circles, I was hoping my hard work will be seen. And you know what? The sun and warmth are back to Brno again!!
I used Catona yarn by Scheepjes to make this necklace. It is sport weight 100% cotton yarn and it is my favourite at the moment. Mostly because it suits the needs of overlay crochet in the best way (you can read my review HERE). Catona is available for purchase via Deramores* and Wool Warehouse* (both retailers ship yarn internationally), Paradise Fibers* (US) and also in Scheepjes local shops.
I went for bright spring colours and mixed together shades 208, 395, 282, 388, 157, 162 with a tiny accent of 245. I also used wooden beads in two sizes and different colours – just what I could find in the local craft shop.
The way this necklace looks is exactly the same as I was visualizing it in my head. This doesn’t happen too often, and thus I am double happy. It can be worn in a longer, or shorter way. And I also think that a version with only one big mandala will be very nice.
Free pattern of this necklace will be published later this week. You can subscribe to Newsletter not to miss it. And you can also follow me on Facebook, Pinterest and Instagram.

*This blog post contains affiliate links. Thanks for your support!
Overlay crochet has been keeping my crochet life for 2 years already. I just cannot stop creating intricate designs with lots of front post stitches and multiple changes of colours. Most projects in overlay crochet are rated as intermediate and some of them are truly advanced. And I have always wanted to come up with something simple, and beautiful at the same time. The beauty is in simplicity. That’s true, indeed. So this time I decided to give it a try and to stream my creative energy into a little bit different direction.
Well, I should say that designing simple things is quite difficult. And I have been always jealous for designers who can come up with genius and so simple designs at the same time. But I didn’t want to give up.
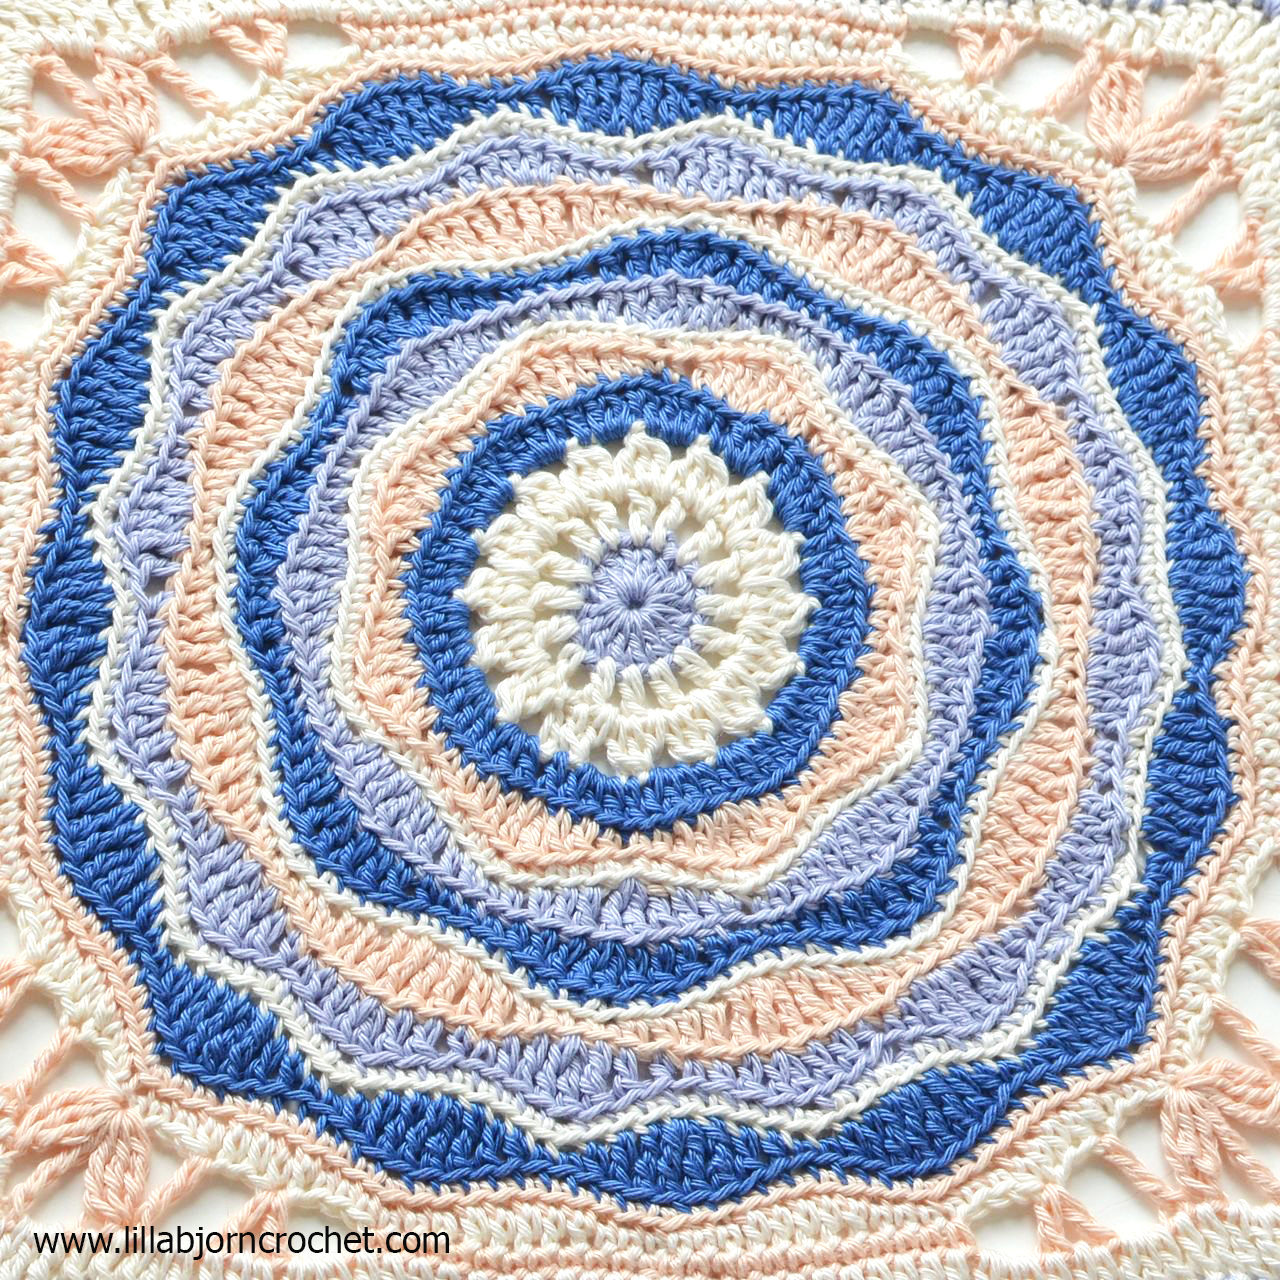
At first I started to create a mandala. I wanted it to look as a flower with petals reminding of waves. And then when it was large enough, I thought: what if I try to square it up. This part took a little bit longer, and I rejected 3 versions before I was satisfied with the final look. I used Sport weight yarn Catona* by Scheepjes, which is 100% cotton (you can read my review about this yarn HERE) and 2.5mm (C) hook. And when I finished my square and measured it, I found out it is exactly 30cm (12”) large. YAY! It seems like I’ve created my first ever afghan square without even having it in mind!
This pattern is available HERE on Ravelry and HERE on Etsy. If you are in US you can check Catona yarn on Paradise Fibers*.
My squares are made with thin yarn and small hook, and of course if different weight of yarn is chosen (like DK or worsted) the square will become larger. But it is very easy to adjust its size. To make it smaller, you can just leave out a few outer rounds – to make it of exact size you need.
12” afghan square is a classical size for making blankets, afghans and throws. But I believe they can be used in many other different ways. For example if you take thick yarn and make a larger square, it can become a wonderful decoration for your pillow cover. And I decided to try to make a stool cover from mine. And it suites my stool perfect.
I just continued to crochet with double crochet stitches (US terms) on each of 4 sides and made 1 dc in each of 4 spaces in the corners. I changed the colour on every round and made 6 rounds in total. And ta-dah! Here is the result :)
I believe this pattern is very easy to follow and is aimed to advanced beginners. As always I added lots of progress pictures to illustrate every round (the attachment of new yarn and placement of the stitches). But there is also a print friendly copy of the pattern available for download – with text only.
I used yarn in 4 colours, but you can express your own creativity and use more shades if you wish. And you can also think of your own colourway to make your square unique and exactly like you want it to be.
I will be happy to see you finished project.
You can subscribe to weekly newsletter not to miss a single post. You can also follow me on Facebook, Pinterest and Instagram.

*This blog post contains affiliate links. Thanks for your support!
Well, I should say that designing simple things is quite difficult. And I have been always jealous for designers who can come up with genius and so simple designs at the same time. But I didn’t want to give up.
At first I started to create a mandala. I wanted it to look as a flower with petals reminding of waves. And then when it was large enough, I thought: what if I try to square it up. This part took a little bit longer, and I rejected 3 versions before I was satisfied with the final look. I used Sport weight yarn Catona* by Scheepjes, which is 100% cotton (you can read my review about this yarn HERE) and 2.5mm (C) hook. And when I finished my square and measured it, I found out it is exactly 30cm (12”) large. YAY! It seems like I’ve created my first ever afghan square without even having it in mind!
This pattern is available HERE on Ravelry and HERE on Etsy. If you are in US you can check Catona yarn on Paradise Fibers*.
My squares are made with thin yarn and small hook, and of course if different weight of yarn is chosen (like DK or worsted) the square will become larger. But it is very easy to adjust its size. To make it smaller, you can just leave out a few outer rounds – to make it of exact size you need.
12” afghan square is a classical size for making blankets, afghans and throws. But I believe they can be used in many other different ways. For example if you take thick yarn and make a larger square, it can become a wonderful decoration for your pillow cover. And I decided to try to make a stool cover from mine. And it suites my stool perfect.
I just continued to crochet with double crochet stitches (US terms) on each of 4 sides and made 1 dc in each of 4 spaces in the corners. I changed the colour on every round and made 6 rounds in total. And ta-dah! Here is the result :)
I believe this pattern is very easy to follow and is aimed to advanced beginners. As always I added lots of progress pictures to illustrate every round (the attachment of new yarn and placement of the stitches). But there is also a print friendly copy of the pattern available for download – with text only.
I used yarn in 4 colours, but you can express your own creativity and use more shades if you wish. And you can also think of your own colourway to make your square unique and exactly like you want it to be.
I will be happy to see you finished project.
You can subscribe to weekly newsletter not to miss a single post. You can also follow me on Facebook, Pinterest and Instagram.

*This blog post contains affiliate links. Thanks for your support!
As soon as I decided it’s spring already, and changed my sad winter coat to a favourite spring one – the winter came back the same day. With snow and strong icy winds. Well, it seems like I will have to wait a little bit more before the sun and warmth finally arrive to the Czech Republic. But in a meanwhile I am trying to warm myself up with a new crochet project.
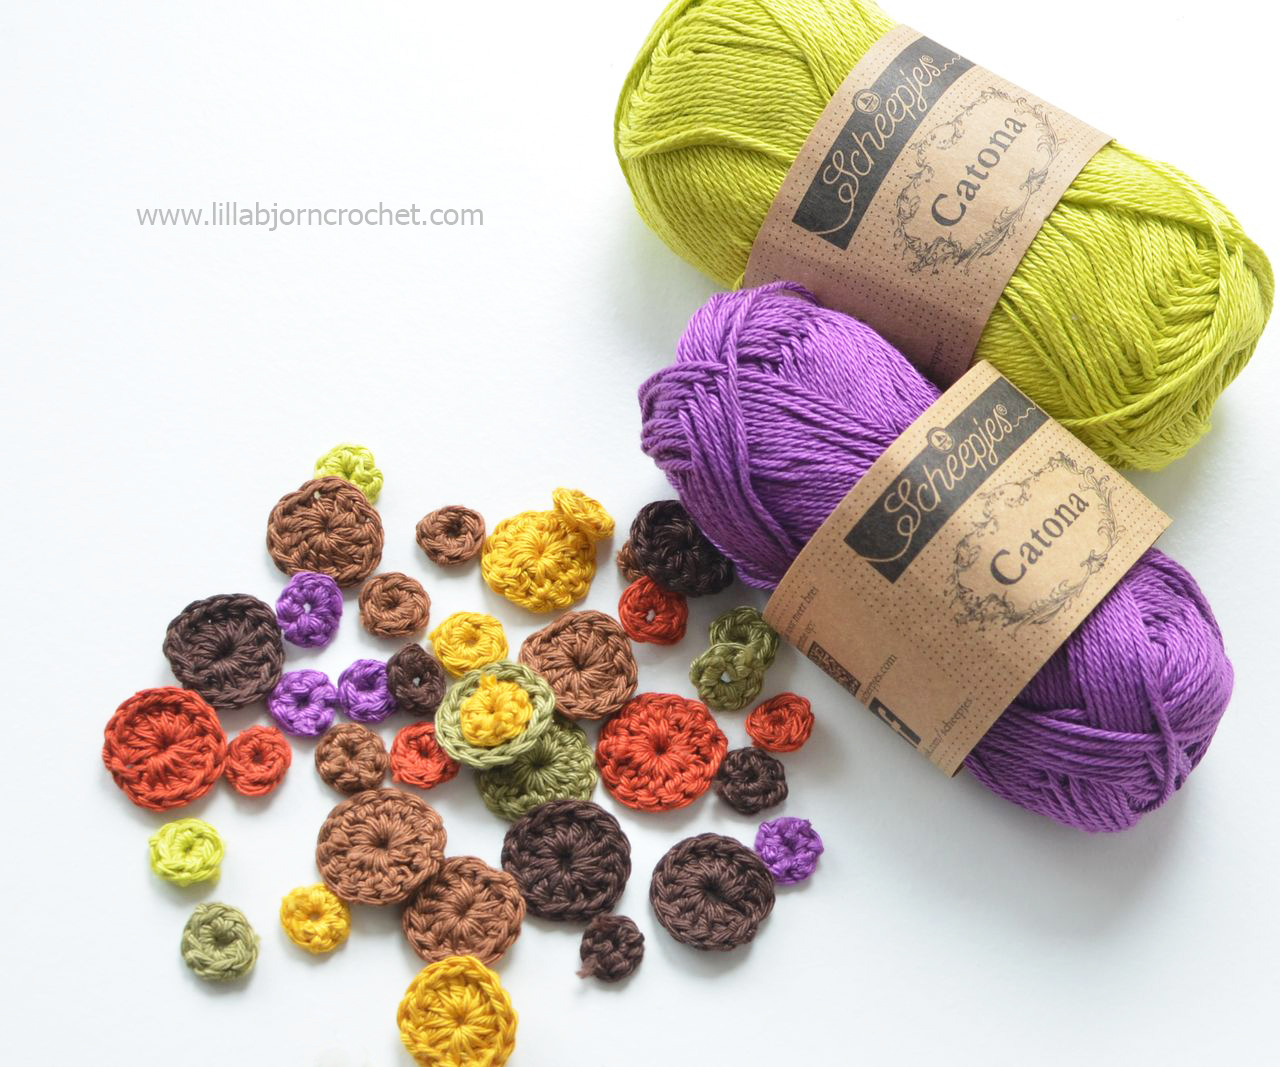
Last week I wrote a review abou Catona* cotton yarn by Scheepjes (you can read it HERE). I chose bright and spring colors for my new design. I wanted something happy, colourful and quick. You may probably guess from the pictures what I am busy with, but I rather don’t tell you to keep an illusion of secret till next week.
I was a little bit unsure about terracotta shade in this combination but luckily it suits well.
This project teaches me to be patient. I made lots and lots of small colorful circles with single and double crochet stitches. And it takes me three times longer to carefully weave in and hide all yarn tails than to make the circles themselves. Did I tell you I am not a fun a weaving in? I am absolutely not! When possible I prefer to hide tails with “as-you-go” method (described HERE). But sometimes it doesn’t work and then I have to take my tapestry needle and spend some hours with weaving. And trying to stay calm…
But at least those small colorful tails look nice in the pictures. Don’t they?
I hope the spring will see all my hard work and efforts, and hear my appeals. And will come back very soon. To strengthen my hope and will, I even bought myself the flowers :)
Next week I will show you my new finished project, and a free pattern will be soon published here, on my blog! You can check Catona yarn HERE on Wool Warehouse* (international shipping) and Paradise Fibers* (US).
You can subscribe to weekly newsletter not to miss a single post. You can also follow me on Facebook, Pinterest and Instagram.
See you soon!

*This blog post contains affiliate links. Thanks for your support!
Last week I wrote a review abou Catona* cotton yarn by Scheepjes (you can read it HERE). I chose bright and spring colors for my new design. I wanted something happy, colourful and quick. You may probably guess from the pictures what I am busy with, but I rather don’t tell you to keep an illusion of secret till next week.
I was a little bit unsure about terracotta shade in this combination but luckily it suits well.
This project teaches me to be patient. I made lots and lots of small colorful circles with single and double crochet stitches. And it takes me three times longer to carefully weave in and hide all yarn tails than to make the circles themselves. Did I tell you I am not a fun a weaving in? I am absolutely not! When possible I prefer to hide tails with “as-you-go” method (described HERE). But sometimes it doesn’t work and then I have to take my tapestry needle and spend some hours with weaving. And trying to stay calm…
But at least those small colorful tails look nice in the pictures. Don’t they?
I hope the spring will see all my hard work and efforts, and hear my appeals. And will come back very soon. To strengthen my hope and will, I even bought myself the flowers :)
Next week I will show you my new finished project, and a free pattern will be soon published here, on my blog! You can check Catona yarn HERE on Wool Warehouse* (international shipping) and Paradise Fibers* (US).
You can subscribe to weekly newsletter not to miss a single post. You can also follow me on Facebook, Pinterest and Instagram.
See you soon!

*This blog post contains affiliate links. Thanks for your support!
In this post I would like to share one wonderful crochet tip with you. It was not invented by me, but Emma Aldous is the “author”. If you tried her Sophie loves Lilla Bjorn Winter Blanket, then you are probably familiar with this tip already. Emma used it to create the outer border with Dancing Dandelions. But this tip can be used in a wide variety of projects, and Emma has kindly given me a permission to create a photo-tutorial and to share it with you.
As these are the clusters made around the posts from round below, I thought I can call them "Front Post Clusters". And it's an official name of the crochet stitch.
If you are familiar with overlay crochet technique already, you probably know that the background is always crocheted in back loops only, and then long and complex stitches are added in the free front loops of previous rounds. You can read more about this basic of overlay crochet HERE. But sometimes I can hear that you don’t like the ribbed structure of fabric cause by crocheting in back loops. And it may be not satisfying when front loops are pulled too much when overlaid stitches are “anchored” to them.
As I mainly design in overlay crochet I’ve started to think if background would not look more neat if made in a classical way – it means through both loops. And if yes, then how can overlaid stitches be attached?
I guess when it comes to single front post stitches – then it is really easy. You will just make them around the post of stitches from previous rounds. And you don’t need free front loops for that. But what if you want to make a cluster? If you just make several front post stitches together around one stitch below (as is recommended by numerous titorials) – the cluster will not look nice and puffy. It will remind a mess of stitches made in one place.
But instead you can use a wonderful (and so clever!) tip from Emma Aldous.
What is cluster? It is a set of crochet stitches that you work in one (or several) stitch(es) and join together (or cluster) at the top, forming a “puff” shape. When you add a cluster to a front loop – it is easy, right? You just make 2, 3, or 5 stitches in the same loop, and then join them together.
But when you make a front post cluster, first you should make a front post stitch, and then the rest are added to the hole at the bottom of this front post stitch. In the pictures below you will see step-by-step tutorial on how to make a 4tr-cluster (or tr4tog - US terms) around the dc stitch of the previous round (for this tutorial I used Catona* yarn from Scheepjes).
But in fact you can make front post clusters around any stitches. For example, single crochet stitch is short, that’s true. But it also has a post, and you can absolutely make a front post cluster around it (see pictures below).
Now when you know how to make front post clusters, you can try to adjust pattern in overlay crochet and to get rid of ribbing (caused by crochet in back loops only). You can now try to crochet through both loops only and all overlaid stitches around the posts, rather than in front loops.
I would like to thank Emma Aldous once again for this wonderful tip. I’ve used it myself in my new project, which will stay a secret for a while. But I promise to reveal it soon!
You can subscribe to weekly newsletter not to miss a single post. You can also follow me on Facebook, Pinterest and Instagram.

*This blog post contains affiliate links. Thanks for your support!
As these are the clusters made around the posts from round below, I thought I can call them "Front Post Clusters". And it's an official name of the crochet stitch.
If you are familiar with overlay crochet technique already, you probably know that the background is always crocheted in back loops only, and then long and complex stitches are added in the free front loops of previous rounds. You can read more about this basic of overlay crochet HERE. But sometimes I can hear that you don’t like the ribbed structure of fabric cause by crocheting in back loops. And it may be not satisfying when front loops are pulled too much when overlaid stitches are “anchored” to them.
As I mainly design in overlay crochet I’ve started to think if background would not look more neat if made in a classical way – it means through both loops. And if yes, then how can overlaid stitches be attached?
I guess when it comes to single front post stitches – then it is really easy. You will just make them around the post of stitches from previous rounds. And you don’t need free front loops for that. But what if you want to make a cluster? If you just make several front post stitches together around one stitch below (as is recommended by numerous titorials) – the cluster will not look nice and puffy. It will remind a mess of stitches made in one place.
But instead you can use a wonderful (and so clever!) tip from Emma Aldous.
What is cluster? It is a set of crochet stitches that you work in one (or several) stitch(es) and join together (or cluster) at the top, forming a “puff” shape. When you add a cluster to a front loop – it is easy, right? You just make 2, 3, or 5 stitches in the same loop, and then join them together.
But when you make a front post cluster, first you should make a front post stitch, and then the rest are added to the hole at the bottom of this front post stitch. In the pictures below you will see step-by-step tutorial on how to make a 4tr-cluster (or tr4tog - US terms) around the dc stitch of the previous round (for this tutorial I used Catona* yarn from Scheepjes).
But in fact you can make front post clusters around any stitches. For example, single crochet stitch is short, that’s true. But it also has a post, and you can absolutely make a front post cluster around it (see pictures below).
Now when you know how to make front post clusters, you can try to adjust pattern in overlay crochet and to get rid of ribbing (caused by crochet in back loops only). You can now try to crochet through both loops only and all overlaid stitches around the posts, rather than in front loops.
I would like to thank Emma Aldous once again for this wonderful tip. I’ve used it myself in my new project, which will stay a secret for a while. But I promise to reveal it soon!
You can subscribe to weekly newsletter not to miss a single post. You can also follow me on Facebook, Pinterest and Instagram.

*This blog post contains affiliate links. Thanks for your support!
Subscribe to:
Posts (Atom)


