For me "gauge" is a magic word! It is gauge which makes your project to be the same size as the designer’s work. The word “gauge” usually defines the tension of your crocheted fabric. And it is measured with the amount of stitches and rows necessary to obtain the square approx. 4” x 4” (10 cm x 10 cm). So usually before starting to crochet you should make a swatch of fabric first to see if you can obtain the necessary gauge with chosen yarn and hook. If you get more stitches in a 4”x4” square, then you should change your hook to a smaller one. And if your gauge is too tight you should take a larger hook instead. | Basics and Stitch Tutorials: Introduction Beginner, Intermediate or Advanced? Choosing yarn Attaching new yarn Crochet in back or front loops Gauge Skipping stitches "Anchoring" overlay stitches Finishing rounds |
I usually don’t give gauge in my patterns as my designs can be made with the vast variety of yarns (and hook). I only state that you should choose the hook which will give you a suitable dense fabric. And the most important is that the project should stay flat! So you should “play” with gauge a bit to find the most comfortable just for you and for your chosen yarn.
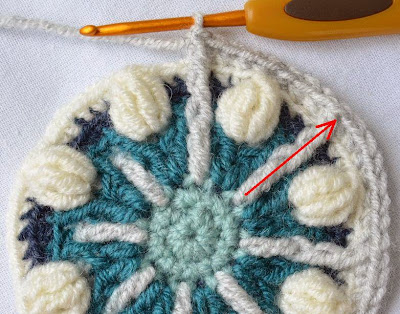
But in overlay crochet “gauge” also means something more! As there are many overlay stitches used it is very important to have their gauge under control. They should be always made to the height of the working round and they should be neither too loose nor too tight. Why? Because they will not look neat and even if they are loose. And if they are tight, it will lead to a deformation of the projetc’s shape.
Let’s see it in the pictures. On Picture 1 the overlay stitches are made too tight and the shape is not a circle any more. And on Picture 2 you can see a project in overlay crochet made with the right gauge!


Post a Comment