Showing posts with label front post stitches. Show all posts
Showing posts with label front post stitches. Show all posts
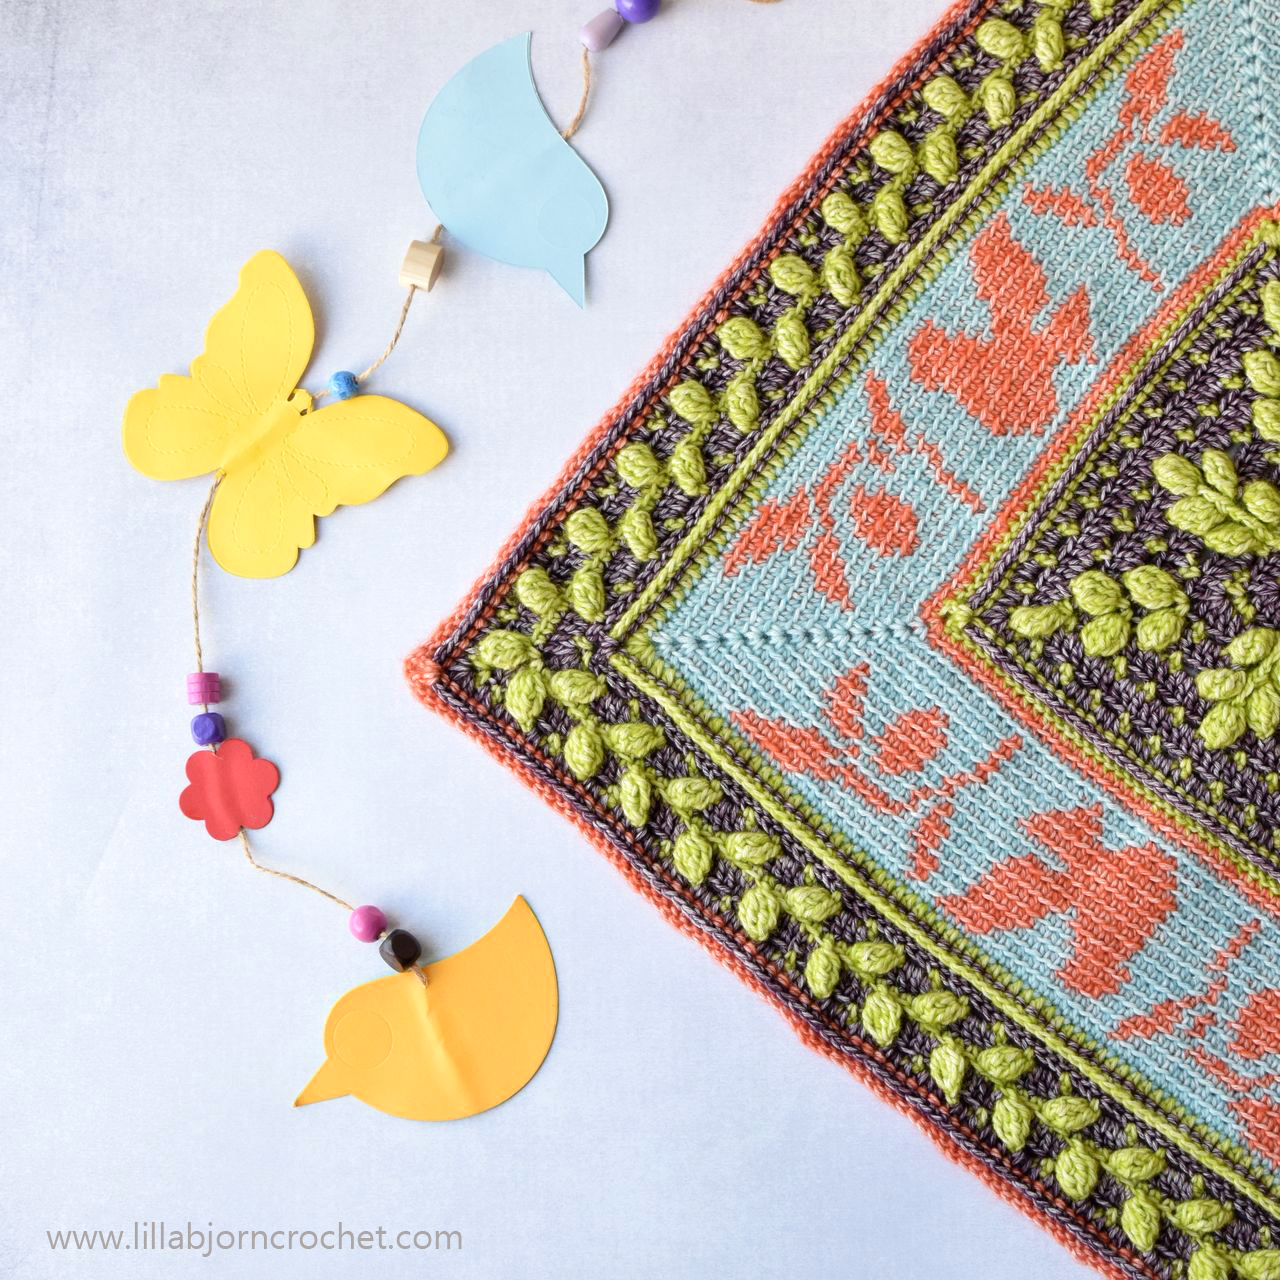
If you know me well, you probably know I love challenges. I take literally every opportunity to learn something new and practice in what I am good already. Several months ago I was approached by lady Talia who asked me to design an afghan crochet square exclusively for a workshop. And now I can share my new design with you!
Dove with an olive branch is known as a symbol for peace. And for me this also means peace of mind and peace of soul. How often we find ourselves in situations when we can’t do much. And then internal peace and hope help us to be strong. To cope… and even survive.
DOVE square pattern is available on Ravelry HERE and Etsy HERE and is offered with 20% discount through Monday, April 2nd, 2018. The discount is already applied in the price you see, and no coupon codes needed.
Add this pattern to your Ravelry Queue
Far not every crochet task sounds doable from the very beginning, but I truly believe that every creative idea can be finally brought to life. Sooner or later. In this or that way. I can’t really tell you how many hours it took me to figure out the whole concept for a dove square. My brain was working not stop for weeks trying to put the pieces of puzzle together. I was thinking about filet crochet, about colorful and solid squares. I even wanted to “draw” the dove with cables, when suddenly it clicked in my mind that I can actually combine several crochet techniques in one design. And woo-hoo here it is!
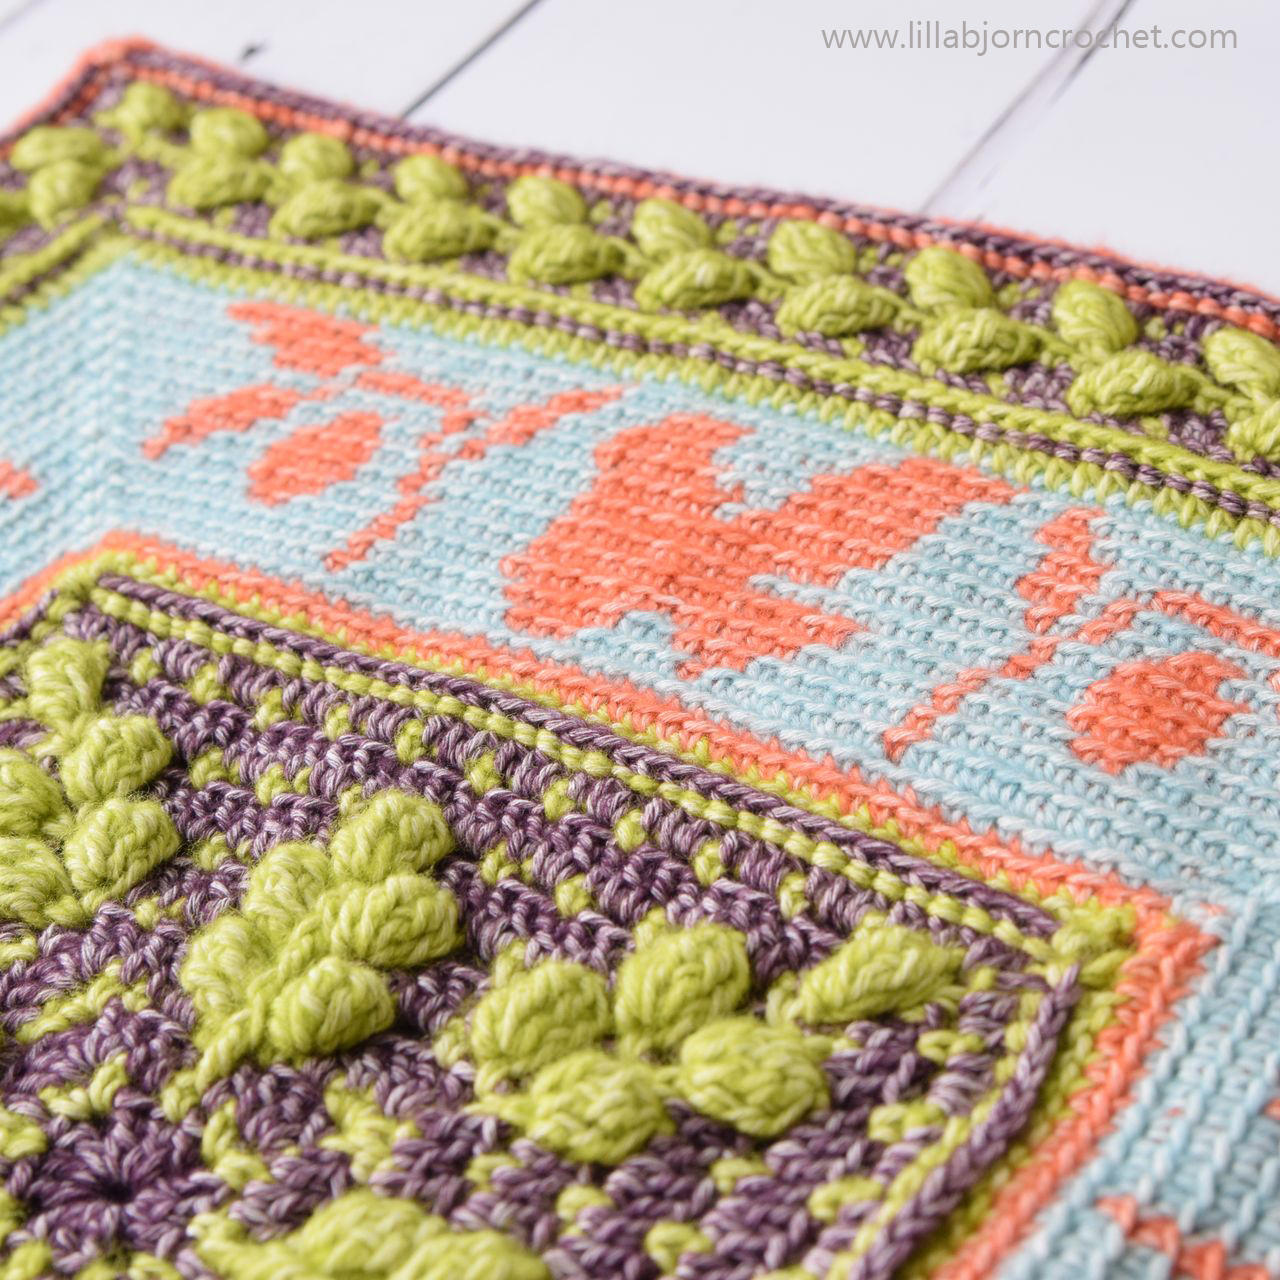
From the very beginning I wanted to design an afghan square. I had no idea how large it will be in the end. And I also wanted to present both symbols (dove and olive branch) together. And it became possible by using structured stitches for the square’s center, and then tapestry panel on the outer edge. To make square look balanced I again added a textured “olive branch border” around it. And I’m pretty happy with how all components look together.
As already mentioned, the pattern uses both tapestry and overlay crochet technique. The stitches are not tricky, but if you haven’t tried these techniques before you might need to practice a bit, before you get control over your tension (check step-by-step tutorial on how to do tapestry crochet HERE). But once you feel comfortable, everything will go smooth. And I also think that DOVE square pattern gives a nice opportunity to learn something new.
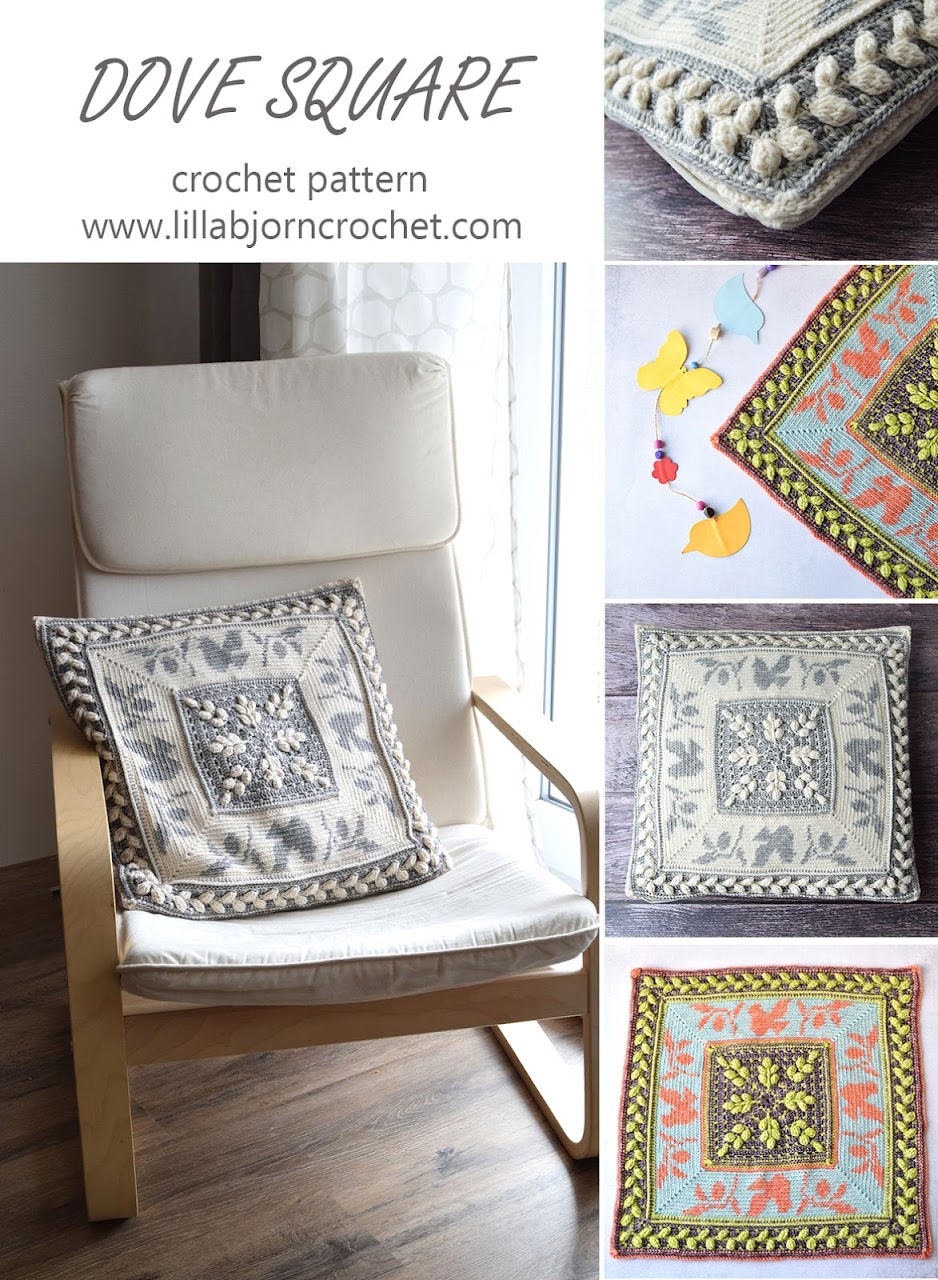
DOVE square can be made with just 2 colors, or more shades (4 for example). I used Stone Washed yarn by Scheepjes (reviewed HERE) for both versions shown in this blog post, together with 4mm Amour Clover hook*. Stone Washed yarn is available in your local Scheepjes stores as well as via larger online retailers, such as Wool Warehouse* and Black Sheep Wools* (both in UK but with international shipping), Caro’s Atelier* (NL and Europe), Knotty House* (Canada) and Loveknitting* (US).
You can use Dove square as a separate decoration for a pillow, or as an afghan square (you can combine squares with and without dove panel for a balanced look). Also central “olive branch squares" can be used as a separate pattern, too.
I am often asked how it is possible to turn crochet square into a pillow. Well, there are several options and one of them it to crochet another square in the same size and then join both pieces together. But I personally prefer another option: I always sew crocheted decoration onto ready fabric pillowcases by hand. I’ve created a short video HERE for you to see how to do it neatly.
If you have other ideas about how to use larger crochet squares, please leave a comment below this post. I would love to hear your ideas.
**************************************************************************
Subscribe to a newsletter not to miss a single post. You can also follow me on Facebook, Pinterest and Instagram.

DISCLOSURE: This blog contains affiliate links (marked with *). If you purchase a (any) product via a link on my blog, I get a small percentage contribution from the store which enables me to keep providing you with free patterns. It costs you nothing extra to visit the store via my link, but ensure I get the credit for the sale. Thank you for your support!
Dove with an olive branch is known as a symbol for peace. And for me this also means peace of mind and peace of soul. How often we find ourselves in situations when we can’t do much. And then internal peace and hope help us to be strong. To cope… and even survive.
DOVE square pattern is available on Ravelry HERE and Etsy HERE and is offered with 20% discount through Monday, April 2nd, 2018. The discount is already applied in the price you see, and no coupon codes needed.
Add this pattern to your Ravelry Queue
Far not every crochet task sounds doable from the very beginning, but I truly believe that every creative idea can be finally brought to life. Sooner or later. In this or that way. I can’t really tell you how many hours it took me to figure out the whole concept for a dove square. My brain was working not stop for weeks trying to put the pieces of puzzle together. I was thinking about filet crochet, about colorful and solid squares. I even wanted to “draw” the dove with cables, when suddenly it clicked in my mind that I can actually combine several crochet techniques in one design. And woo-hoo here it is!
From the very beginning I wanted to design an afghan square. I had no idea how large it will be in the end. And I also wanted to present both symbols (dove and olive branch) together. And it became possible by using structured stitches for the square’s center, and then tapestry panel on the outer edge. To make square look balanced I again added a textured “olive branch border” around it. And I’m pretty happy with how all components look together.
As already mentioned, the pattern uses both tapestry and overlay crochet technique. The stitches are not tricky, but if you haven’t tried these techniques before you might need to practice a bit, before you get control over your tension (check step-by-step tutorial on how to do tapestry crochet HERE). But once you feel comfortable, everything will go smooth. And I also think that DOVE square pattern gives a nice opportunity to learn something new.
DOVE square can be made with just 2 colors, or more shades (4 for example). I used Stone Washed yarn by Scheepjes (reviewed HERE) for both versions shown in this blog post, together with 4mm Amour Clover hook*. Stone Washed yarn is available in your local Scheepjes stores as well as via larger online retailers, such as Wool Warehouse* and Black Sheep Wools* (both in UK but with international shipping), Caro’s Atelier* (NL and Europe), Knotty House* (Canada) and Loveknitting* (US).
You can use Dove square as a separate decoration for a pillow, or as an afghan square (you can combine squares with and without dove panel for a balanced look). Also central “olive branch squares" can be used as a separate pattern, too.
I am often asked how it is possible to turn crochet square into a pillow. Well, there are several options and one of them it to crochet another square in the same size and then join both pieces together. But I personally prefer another option: I always sew crocheted decoration onto ready fabric pillowcases by hand. I’ve created a short video HERE for you to see how to do it neatly.
If you have other ideas about how to use larger crochet squares, please leave a comment below this post. I would love to hear your ideas.
**************************************************************************
Brief facts about DOVE square:
- Level: Intermediate: tapestry crochet, clusters and front post stitches
- Language: English (US terms)
- Pattern contains complete written instructions and heavy photo-tutorial illustrating every round (except of tapestry panel which should be followed with chart and written text). The resolution of pictures is good enough to be zoomed in.
- DOVE square pattern is available on Ravelry HERE and Etsy HERE and is offered with 20% discount through Monday, April 2nd, 2018. The discount is already applied in the price you see, and no coupon codes needed.
Subscribe to a newsletter not to miss a single post. You can also follow me on Facebook, Pinterest and Instagram.

DISCLOSURE: This blog contains affiliate links (marked with *). If you purchase a (any) product via a link on my blog, I get a small percentage contribution from the store which enables me to keep providing you with free patterns. It costs you nothing extra to visit the store via my link, but ensure I get the credit for the sale. Thank you for your support!
4 Comments
Öresund Sky Bathmat was inspired by my latest trip to Sweden, where I tried to escape from my real life, to switch off, recharge by the sea and to feel happy again. I spent long hours at the beach in Malmö making this bathmat. It didn’t have any name even after being finished. I asked for help on my page on Facebook and was given so many nice and creative suggestions! One of them was to call it Evening Sky. And this name resonated with what I felt and saw in Malmö. So I decided to call my new design Öresund Sky Bathmat. Read the whole story behind this design HERE and check more pictures of a finished bathmat HERE.
DISCLOSURE: This blog contains affiliate links. If you purchase a (any) product via a link on my blog, I get a small percentage contribution from the store which enables me to keep providing you with free patterns. It costs you nothing extra to visit the store via my link, but ensure I get the credit for the sale. Thank you for your support!
Öresund is a strait between South of Sweden and Denmark. Famous bridge is connecting both lands with Malmö on one side and Copenhagen on the other. It only takes 30 minutes by train to go to Copenhagen city center. And when you travel over the sea you can see a wonderful view on not less famous Turning Torso building. It is situated in my favorite part of Malmö called Västra Hamnen. I came here every morning to have a cup of coffee and to enjoy crochet by the sea. And in the evening I saw my first Malmö sunset in 15 years. And it was fantastic…
Add this pattern to your Ravelry Queue
You will need:
- Yarn in 5 shades. I used Bloom by Scheepjes in shades 417 (3 skeins), 419 (3 skeins), 421 (3 skeins), 403 (2 skeins), 409 (2 skeins)
- Crochet hook Clover Amour* 4.5mm
- Scissors and tapestry needle to weave yarn tails in.
Finished Measurements
The size of finished bathmat will depend on yarn and hook you choose, and also on your personal gauge. My mathmat is approx. 55cm x 75cm (21 ½” x 29 ½”).
Gauge
18 sts x 20 rows = 10cm x 10cm (4” x 4”)Level
Intermediate (though I believe advanced beginners can handle this pattern as well).
Stitch guide and Abbreviations
US standard abbreviations are used in this pattern. But if you are used to other terms, please check this Crochet Translation Project which might be helpful in translation to your native language.
st(s) - stitch(es)
ss (slip stitch) – insert hook in indicated st, yo, draw yarn up and pull 2nd lp through the 1st lp on hook.
ch - chain
sc (single crochet) – insert hook in indicated stitch, yo, draw up a lp, yo and pull through both lps on hook.
FPtr (front post treble crochet) - yo twice, insert hook from front to back to front around he post of indicated stitch, yo, draw up a lp, *yo, pull through 2 lps* 3 times.
RS right side
WS wrong side
Important Notes and Tips
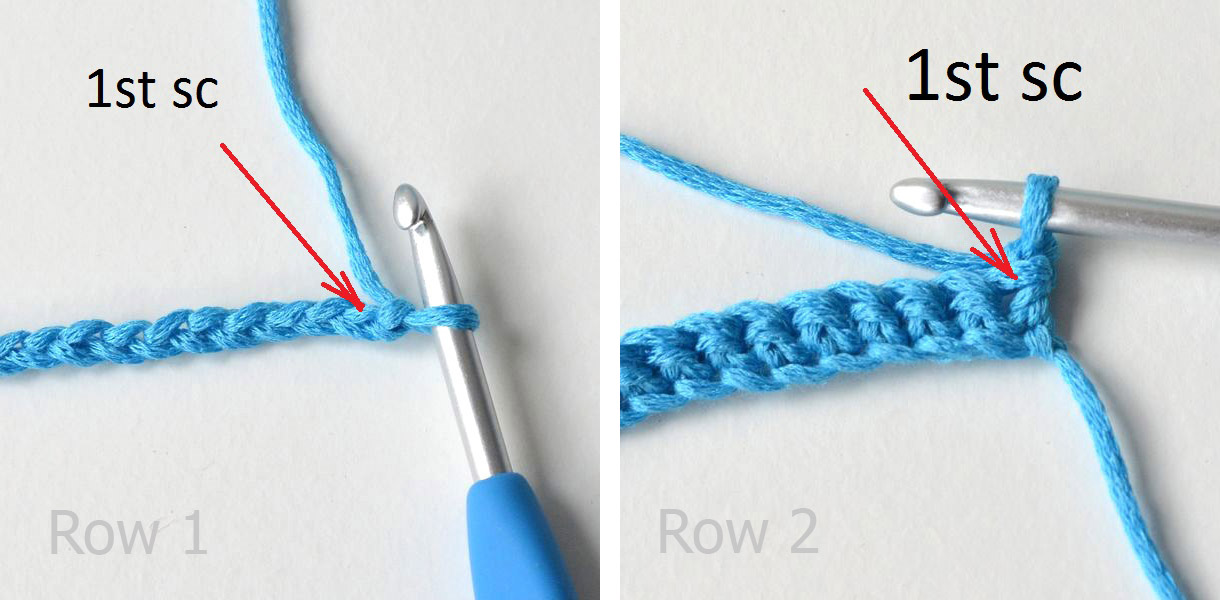
- Ch1 in the beginning of every row doesn’t count as sc. So 1st sc of every row is made in 1st sc of previous row.
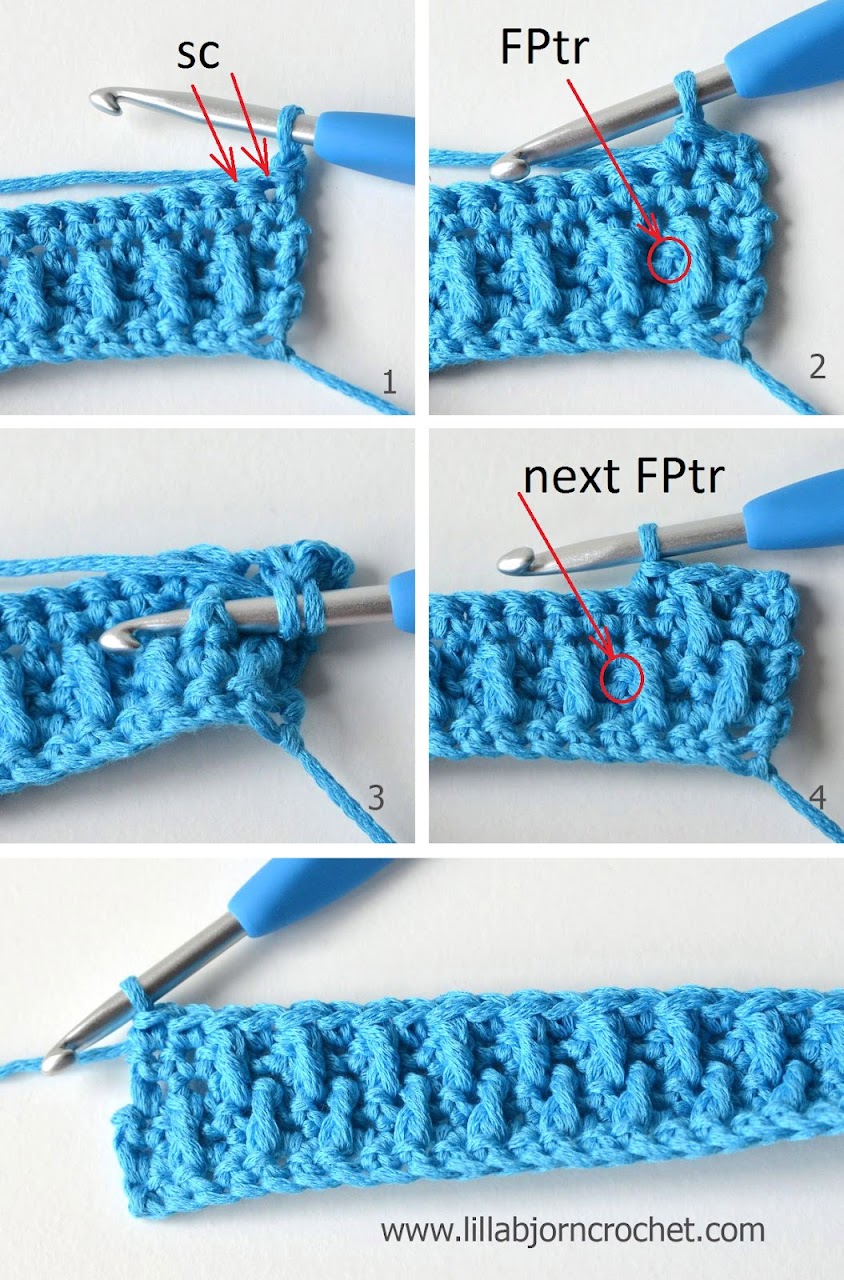
- FPtr's should be made to the height of working row. They must not be too loose or pull.
- Always skip 1st of previous row behind every FPtr just made.
- You can easily adjust the size of Öresund Sky Bathmat. To make it wider make any even number of ch in the beginning. To make it longer, just crochet more rows in each stripe.
- To reduce the amount of yarn tails, don’t cut yarn while making colorful stripes. You will get floats of yarn on the sides but they will be hidden by the border. (So cut yarn before and after each colorful stripe always leaving 20 cm/8in tail).
- Change colour on the last yarn-over of the last sc of the relevant row.
INSTRUCTIONS
Add this pattern to Ravelry Queue
Copyright LillaBjornCrochet 2016. All rights reserved. This pattern is for unlimited personal use only. Do not reproduce or sell the pattern. The pattern may not be copied in any way (print or digitally), in part or in full. Items may be sold that are made from this pattern as long as the designer is credited. Shop owners, if you wish to make a kit with yarn using this pattern, please request permission and copyright details from me before offering any kits for sale. Please, read Copyright page for more information.
Öresund Sky Bathmat consists of 7 colorful stripes divided by 6 narrow stripes in gray. Colorway for each colorful stripe is given below.
C1 – 417 (Blue), C2 – 419 (Light Turqiouse), C3 – 421 (Gray), C4 – 403 (Dark Purple), C5 – 409 (Pink)
Colorful stripe 1
Ch 86.
Row 1. 1sc in 2nd ch from hook, 1sc in every ch to the end. Turn. (85sc – same stitch count is for the rest of the pattern)
Row 2-3. Ch1 (doesn’t count as sc here and throughout), 85sc. Turn.
Row 4. Ch1, *1sc, skip 1 st on row 1, 1FPtr around next st of row 1, skip 1st behind FPtr just made; repeat from * to the end leaving 1 st unworked, 1sc in last st. Turn.
Row 5. Ch1, 85sc. Turn.
Row 6. Ch1, 1sc in 2sts, *1FPtr around st from 3 rows below visible just after FPtr below, skip 1 st, 1sc in next st; repeat from * to the end leaving 1 st unworked, 1sc in last st. Turn.
Row 7. Ch1, 85sc. Turn.
Row 8. Ch1, *1sc, 1FPtr around 2nd st from 3 rows below, skip 1 st, 1sc in next st, *1FPtr around st from 3 rows below visible just after FPtr below, skip 1 st, 1sc in next st; repeat from * to the end. Turn.
Rows 9-12. Repeat rows 5-8
Row 13. As Row 5
Row 14. As Row 6
Row 15. As row 7
Gray stripe
Row 16-20. With C3. Ch1, 85 sc, turn.
Colorful Stripe 2
Row 1. Ch1, 85sc, turn.
Row 2-15. As for colorful stripe 1.
Continue with the pattern alternating colorful and grey stripes (repeating rows 1-20) for 135 rows in total. You should get 7 colorful stripes and 6 gray stripes between them.
Colorway for stripes:
Stripes 1 and 5:
Rows 1-6 with C1.
Rows 7-10 with C2.
Rows 11-12 with C1
Rows 13-15 with C2
Stripes 2 and 6:
Rows 1-6 with C4
Rows 7-10 with C5
Rows 11-12 with C4
Rows 13-15 with C5
Stripes 3 and 7
Rows 1-6 with C2
Rows 7-10 with C1
Rows 11-12 with C2
Rows 13-15 with C1
Stripe 4
Rows 1-6 with C5
Rows 7-10 with C4
Rows 11-12 with C5
Rows 13-15 with C4
Border
After row 135 change to C3, turn and start working the border around the bathmat. The border is made in back and forth, so in the eand of each row join with slip stitch in 1st sc and turn.
TIP: to hide floats of yarn – crochet 1st round of the border over them.
Round 1. In this rnd mark 2nd sc of 3 in each corner.
(RS) Ch1, 3sc in 1st st, 83 sc, 3sc in last sc, turn quarter, 108 sc along next side (make 12sc evenly in each colorful stripe and 4 sc in each grey stripe), turn quarter, 3sc in 1st ch, 83sc, 3sc in last ch, turn quarter, 108sc along next side (as previous); join with ss in 1st sc of this rnd. Turn. (83 sts on each short side, 108 sts on long side, 3sc in each corner = 394sc in total)
Round 2. In this rnd mark 2nd sc of 3 in each corner.
(WS) Ch1, 1sc in 1st sc. Continue crocheting with sc around the blanket making 3 sc in each marked st, join with ss in 1st sc. Turn.
Round 3-5. As Round 2. Fasten off. Weave in all yarn tails.
Congratulations!! Your Öresund Sky Bathmat is now finished!
You can subscribe to monthly newsletter not to miss a single post. You can also follow me on Facebook, Pinterest and Instagram.

p.s. This bathmat is quite slippery. If you want to use for a bathroom you shoould add some anti-slip material underneath. I have 2 ideas about how it prevent it from being slippery. And I will share my thoughts with you next week! UPDATE: my review about 3 ways to make a crochet rug non slip is HERE.
In this post I would like to share one wonderful crochet tip with you. It was not invented by me, but Emma Aldous is the “author”. If you tried her Sophie loves Lilla Bjorn Winter Blanket, then you are probably familiar with this tip already. Emma used it to create the outer border with Dancing Dandelions. But this tip can be used in a wide variety of projects, and Emma has kindly given me a permission to create a photo-tutorial and to share it with you.
As these are the clusters made around the posts from round below, I thought I can call them "Front Post Clusters". And it's an official name of the crochet stitch.
If you are familiar with overlay crochet technique already, you probably know that the background is always crocheted in back loops only, and then long and complex stitches are added in the free front loops of previous rounds. You can read more about this basic of overlay crochet HERE. But sometimes I can hear that you don’t like the ribbed structure of fabric cause by crocheting in back loops. And it may be not satisfying when front loops are pulled too much when overlaid stitches are “anchored” to them.
As I mainly design in overlay crochet I’ve started to think if background would not look more neat if made in a classical way – it means through both loops. And if yes, then how can overlaid stitches be attached?
I guess when it comes to single front post stitches – then it is really easy. You will just make them around the post of stitches from previous rounds. And you don’t need free front loops for that. But what if you want to make a cluster? If you just make several front post stitches together around one stitch below (as is recommended by numerous titorials) – the cluster will not look nice and puffy. It will remind a mess of stitches made in one place.
But instead you can use a wonderful (and so clever!) tip from Emma Aldous.
What is cluster? It is a set of crochet stitches that you work in one (or several) stitch(es) and join together (or cluster) at the top, forming a “puff” shape. When you add a cluster to a front loop – it is easy, right? You just make 2, 3, or 5 stitches in the same loop, and then join them together.
But when you make a front post cluster, first you should make a front post stitch, and then the rest are added to the hole at the bottom of this front post stitch. In the pictures below you will see step-by-step tutorial on how to make a 4tr-cluster (or tr4tog - US terms) around the dc stitch of the previous round (for this tutorial I used Catona* yarn from Scheepjes).
But in fact you can make front post clusters around any stitches. For example, single crochet stitch is short, that’s true. But it also has a post, and you can absolutely make a front post cluster around it (see pictures below).
Now when you know how to make front post clusters, you can try to adjust pattern in overlay crochet and to get rid of ribbing (caused by crochet in back loops only). You can now try to crochet through both loops only and all overlaid stitches around the posts, rather than in front loops.
I would like to thank Emma Aldous once again for this wonderful tip. I’ve used it myself in my new project, which will stay a secret for a while. But I promise to reveal it soon!
You can subscribe to weekly newsletter not to miss a single post. You can also follow me on Facebook, Pinterest and Instagram.

*This blog post contains affiliate links. Thanks for your support!
As these are the clusters made around the posts from round below, I thought I can call them "Front Post Clusters". And it's an official name of the crochet stitch.
If you are familiar with overlay crochet technique already, you probably know that the background is always crocheted in back loops only, and then long and complex stitches are added in the free front loops of previous rounds. You can read more about this basic of overlay crochet HERE. But sometimes I can hear that you don’t like the ribbed structure of fabric cause by crocheting in back loops. And it may be not satisfying when front loops are pulled too much when overlaid stitches are “anchored” to them.
As I mainly design in overlay crochet I’ve started to think if background would not look more neat if made in a classical way – it means through both loops. And if yes, then how can overlaid stitches be attached?
I guess when it comes to single front post stitches – then it is really easy. You will just make them around the post of stitches from previous rounds. And you don’t need free front loops for that. But what if you want to make a cluster? If you just make several front post stitches together around one stitch below (as is recommended by numerous titorials) – the cluster will not look nice and puffy. It will remind a mess of stitches made in one place.
But instead you can use a wonderful (and so clever!) tip from Emma Aldous.
What is cluster? It is a set of crochet stitches that you work in one (or several) stitch(es) and join together (or cluster) at the top, forming a “puff” shape. When you add a cluster to a front loop – it is easy, right? You just make 2, 3, or 5 stitches in the same loop, and then join them together.
But when you make a front post cluster, first you should make a front post stitch, and then the rest are added to the hole at the bottom of this front post stitch. In the pictures below you will see step-by-step tutorial on how to make a 4tr-cluster (or tr4tog - US terms) around the dc stitch of the previous round (for this tutorial I used Catona* yarn from Scheepjes).
But in fact you can make front post clusters around any stitches. For example, single crochet stitch is short, that’s true. But it also has a post, and you can absolutely make a front post cluster around it (see pictures below).
Now when you know how to make front post clusters, you can try to adjust pattern in overlay crochet and to get rid of ribbing (caused by crochet in back loops only). You can now try to crochet through both loops only and all overlaid stitches around the posts, rather than in front loops.
I would like to thank Emma Aldous once again for this wonderful tip. I’ve used it myself in my new project, which will stay a secret for a while. But I promise to reveal it soon!
You can subscribe to weekly newsletter not to miss a single post. You can also follow me on Facebook, Pinterest and Instagram.

*This blog post contains affiliate links. Thanks for your support!
Subscribe to:
Posts (Atom)

