Happy Granny Square Day 2025!
Did you know that crocheters all over the world celebrate International Granny Square Day on August 15th? Yes, we do! If you read my blog, you probably already know how to crochet. And most likely you started your crochet journey with a simple granny square, as it’s the most basic shape and a symbol of crochet as a craft.

When we hear ‘granny square’ we know exactly what it means and how it looks. It consists of several rounds of double crochet stitches and chain-spaces (and I am talking US crochet terms), usually with several colors.
Being the simplest and the most basic shape, a granny square can be used for many different projects, including blankets, throws, pillows, bags, scarves, shawls, and even garments. And with the ‘granny stitch’ (not a square), you crochet anything at all. Either in one or multiple colors.

However, today, modern crochet is not only about granny squares anymore. It’s been developing rapidly in the past decade, with tens of different techniques transforming crochet into a new form of fibre art.

To celebrate Granny Square Day this year, I have teamed up with Scheepjes and designed five pillow covers with the new Softfun colour mini packs, using different crochet techniques.

I have been designing with Scheepjes yarns for more than 10 years now, and Softfun yarn has been high on my list of favourites. Mainly because of its softness and hard wear. It holds the shape very well, the stitch definition is brilliant, and crochet projects look good after years of being used and washed. Just the perfect choice for interior accessories.

I worked with Softfun mini colour packs in the past (you can check my Like a Kelim Pillow). They come with curated 12 mini balls, each with 20g of yarn. And that amount is enough to create a medium-sized project, such as a front decoration for a pillow cover.

When Scheejes approached me with an idea of creating designs for new color packs, I was thrilled and honored to join. Let me introduce five new cushion designs exclusively created with new Scheepjes mini colour packs.
You will find a QR code on every pack, bringing you to the pattern page on our website.

Important Links
The ebook with all 5 patterns is available via our website HERE.
You can find the packs at your local Scheepjes store, or via online retailers. Scheepjes yarn is also available on Amazon (*affiliate link). And can also find Softfun minis colour packs on Amazon (affiliate link).

***
Each new Softfun mini colour pack comes with a theme of carefully curated colors, and you can choose from neutral earthy or ombre shades to vibrant brights: Autumn Walk, Ocean Breeze, Spring Blossom, Summer Party and Tropical Paradise.
And of course, you can use the patterns for bigger projects too, as they are easily adjustable. You can either crochet more small squares and join them together into a blanket (Spring Blossom and Summer Party designs). Or you can continue crocheting in rows/rounds until you reach the desired size (Chess Squre, Autumn Walk Square and Geometry Square designs).

As already mentioned, each mini colour pack comes with 240g of yarn in total (12 balls each with 20g), and the yarn is enough for the front panel of the cushion.
I used ready fabric pillowcases to sew my crocheted pieces onto them. Or, alternatively, you can use two packs and create a double-sided pillow, with the same or different design for each side.

The patterns use different crochet techniques: mosaic and overlay crochet. They come with full written instructions in English language (with US crochet terms), detailed progress pictures, and links to instructional video tutorials.

The ebook with all 5 patterns is available via our website HERE.
Hope you enjoy!

Welcome to the first blog post of the year 2025. Do you make resolutions at the end of the year? I used to promise myself to start or quit doing something on January 1st, but well… We do not change overnight and in fact, we stay the same person in the morning, after the New Year's champagne is finished, and fireworks are silent. So no, I have not made any resolutions for this year. Except for a wish to crochet a lot.

And I crocheted a lot in January. So much, that I have two new designs to show you!
First, I would like to thank everyone who joined me for the Gift Mystery make-a-long last December. I was happy to see your cute small projects, and I was also happy to hear you learned some new crochet techniques.

One of them was the short rows. In the past, I already created a few designs with the short rows (check out Astrid Shawl, Hygge Neck Warmer, Ebba Neck Warmer, City Neck Warmer, For Them Sweater, Early Waves Cowl and Seeds Collection).
I knew that some of you were a little overwhelmed with the intricacy of these stitch patterns.

To help you overcome the fear of the short rows, I designed a Gift Coaster, which has become a huge success. The pattern for the Gift Coaster included a heavy support with photo and video tutorials, and I know that it helped you to feel more confident with the technique.
After the make-a-long, I have received a lot of requests for more patterns with short rows, and I heard you! Please, let me introduce a brand-new Shelly collection!

The Shelly Scarf (find it on Ravelry HERE and Etsy HERE) and Shelly Square (find it on Ravelry HERE and Etsy HERE) are available as stand-alone patterns and can be also purchased together as a collection at a reduced price.
It all started with an idea of creating seamless design with textured shells. You can probably find shell patterns out there, but most of them are cut-and-join, while I was trying to come up with an infinity stitch which does not require cutting yarn after every motif. And well, it was possible!

First, I created a Shelly Scarf – a long, textured beauty which is at the same time fully adjustable for length and width. The gauge is not important here, and you can choose any yarn you like (Sport/DK weight is recommended).
The scarf was designed as a parallelogram, but you can easily turn it into a triangular shawl, if you wish.
The construction of the Shelly Scarf is a unique one, and it probably differs from what you have seen before. The pattern is written in macro-rows, each consisting of several motifs (full shells and half-shells).

That might sound scary, but do not worry. The pattern includes full support with video and photo-tutorials. And once you memorize instructions for separate motifs, the crochet will be almost mindless. And hopefully you can continue crocheting the scarf watching your favourite TV series.
My first sample was done with Scheepjes Whirlette and Scheepjes Mohair Rhythm yarns held together. I opted for a larger hook, and I just love the warmth, fluffiness and the drape.

If you cannot wear wool, you can choose cotton-blend yarns. Another sample was crocheted with Scheepjes Stone Washed yarn, which is a blend of cotton and acrylic.

If you follow the gauge in the pattern, your scarf will become softer and even more drapey after the blocking.
Esther Schippers, who helped me with the testing, made Shelly Scarf with Scheepjes Whirl and Scheepjes Mohair Rhythm held together. Her gauge was a little bit tighter, and the scarf turned out a little smaller than mine, but still with a generous length.

For one Whirl cake you will need 5 balls of the Scheepjes Mohair Rhythm yarn. Find Scheepjes yarns in your local Scheepjes shop or buy via online retailers: Caro’s Atelier (NL and Europe), Wool Warehouse (UK with worldwide shipping), Taemombo (US and Canada).
The Shelly Scarf works in rows, and I was wondering if it was possible to use the same stitch pattern but working in the rounds. And this is how my Shelly Square was brought to life.

This is a continuous infinity stitch pattern which can be grown to any size at all. You just need to continue with the same macro-rounds until you are happy with the measurements. And create either a cushion, or a blanket. Or maybe a bag?
I made two samples of Shelly Square and turned both into pillows by stitching the crochet pieces onto the ready-fabric pillowcase by hand.
You can either go for a chic minimalist look with the chunky yarn in one color (I used Scheepjes Chunky Monkey yarn).

Or move off-the-grid with the variegated yarn. Here is my sample with the Stone Washed Minerals yarn. Is anyone in need of some unicorns?

Find Shelly Scarf of Ravelry HERE and Etsy HERE.
Find Shelly Square on Ravelry HERE and Etsy HERE.
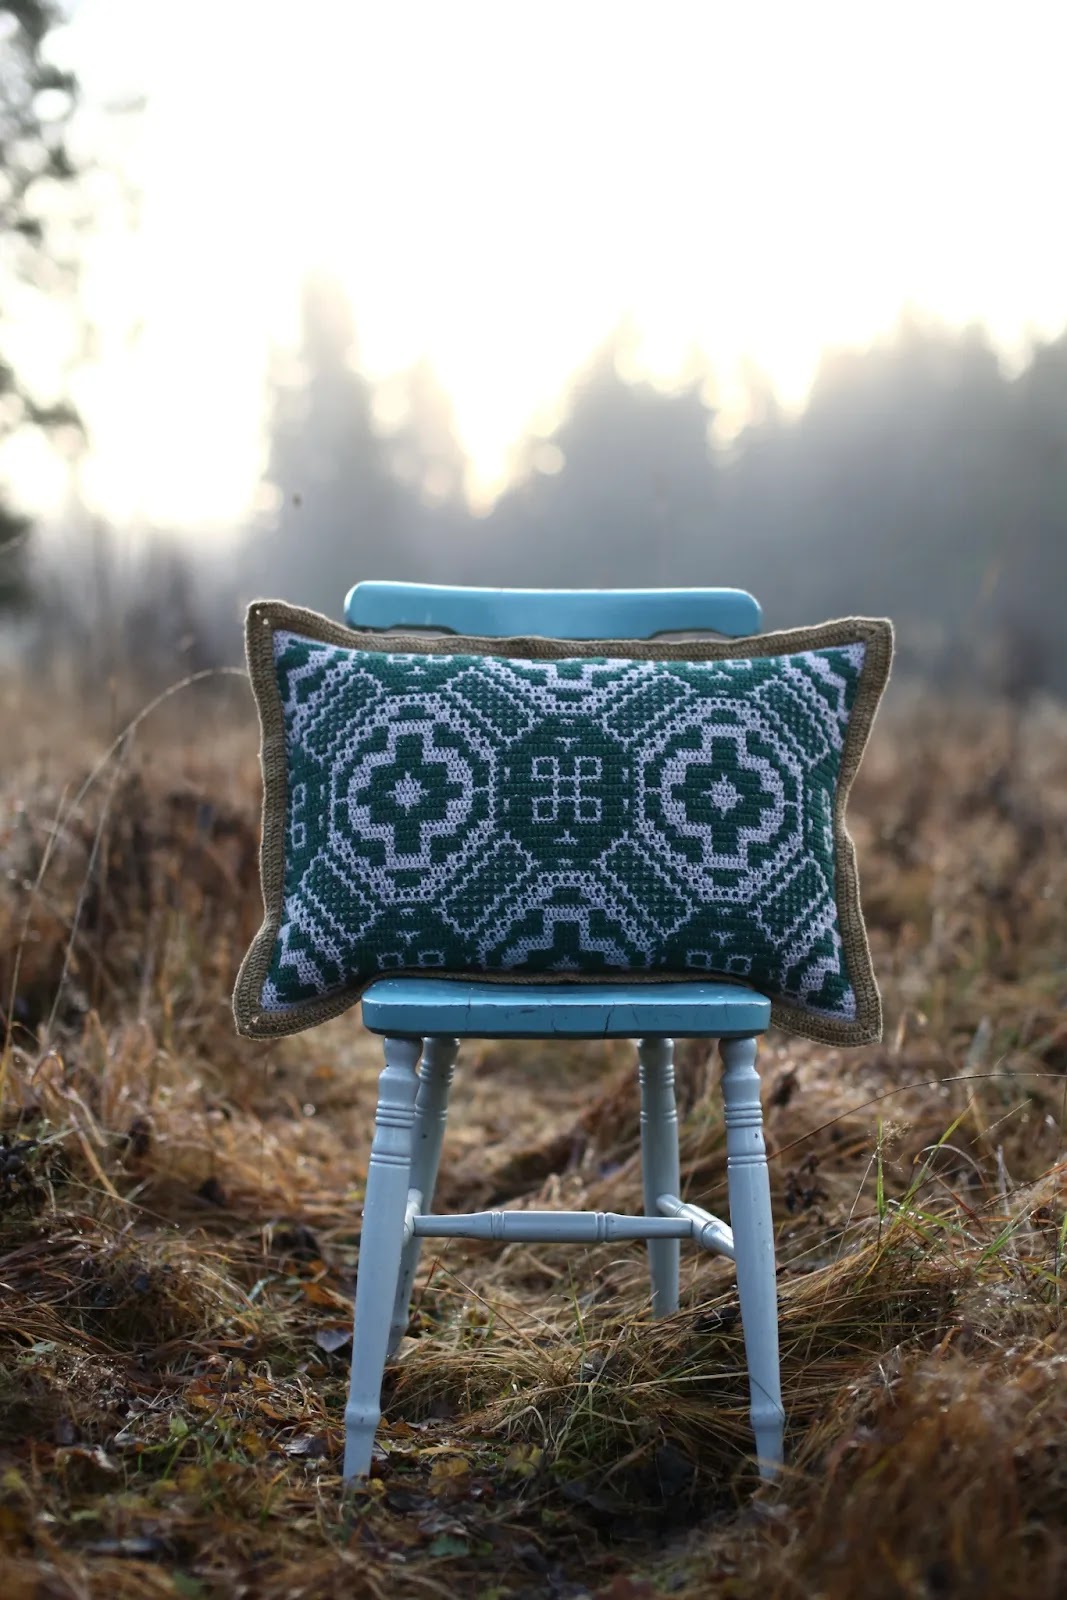
Welcome to the next part of the Geometry & Texture mystery make-a-long. If you missed the previous release, check all information about this event HERE on my blog. And read details about the Early Waves Cowl HERE. Also do not forget to check out the gorgeous Rödön Pillow from Martin Up North which he released as the first mystery design from his pattern pack last week.

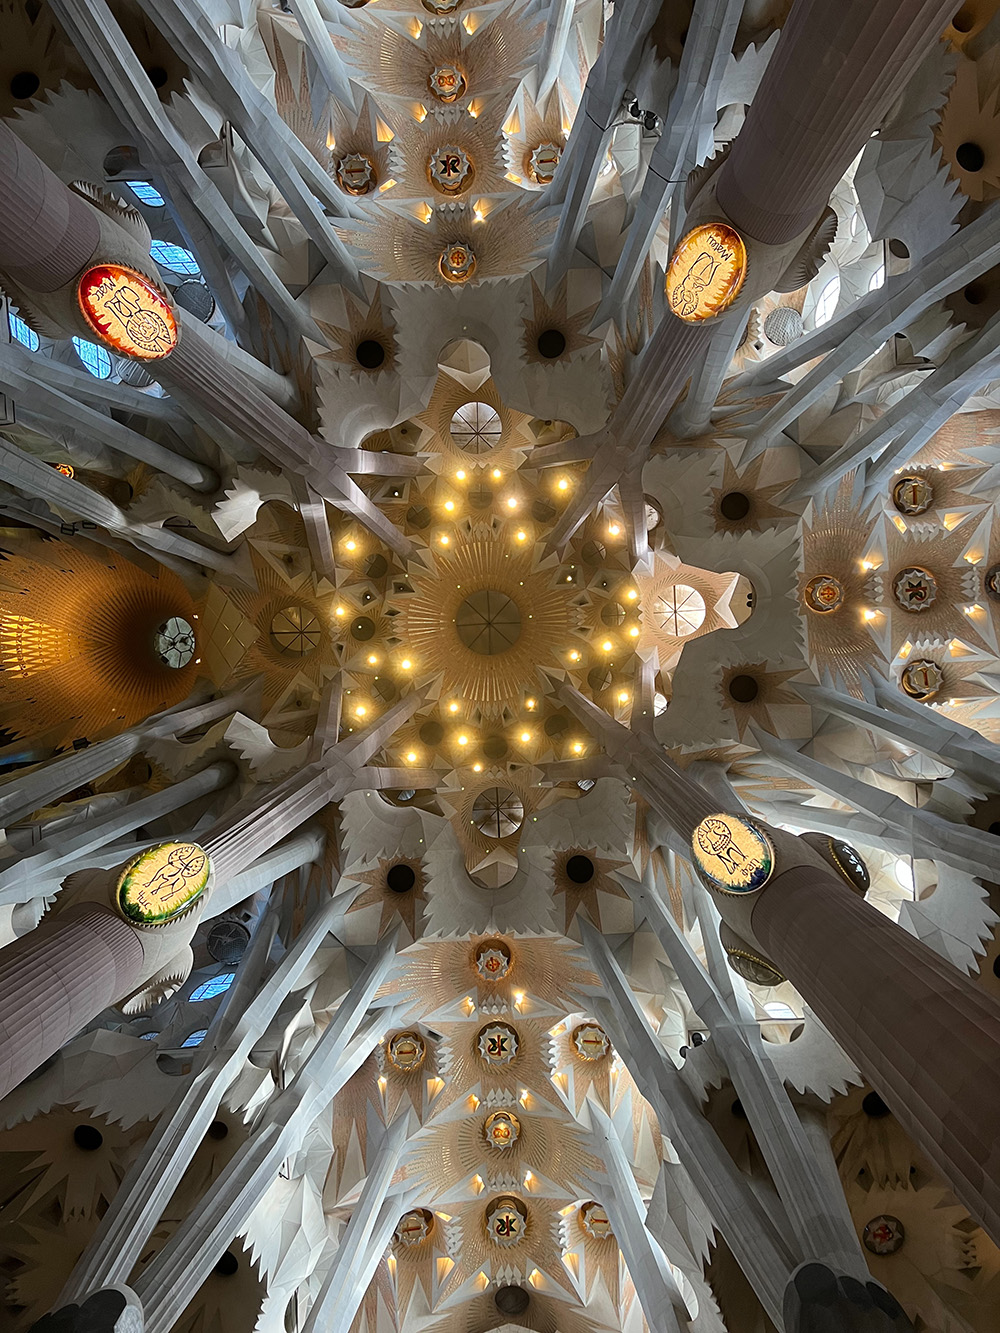
Today’s design is the Gaudi Pillow, named after and inspired by the work of the famous Catalan architect Antoni Gaudi.
The first time I heard about him was at the art course we had at high school. I was fascinated by Gaudi’s talent and architecture. Many years later, in Vienna, I bought an album with pictures of his buildings. And kept hoping I could see the mind-blowing Sagrada Família one day.
My dream came true last September. My friend suggested we could go to Barcelona for a few days, and I felt like the excitement was going to explode in my heart. I refreshed all my memories about Gaudi’s artistic work, I bought all possible entrance tickets online and two weeks in advance. And I simply could not wait!
And the wait for almost all my adult life was worth it. I fell in love again.
Antonio Gaudi was searching for inspiration in the shapes and forms of nature. And my pillow was inspired by the curvy lines of his famous fairy towers on the roof of La Pedrera-Casa Milà.

Gaudi pillow uses embossed crochet technique with front and back post stitches. The pattern is straightforward, however some places might be tricky. But do not worry. I have recorded a full video tutorial for this pattern (you will find the link inside pillow’s instructions).

I have made one square in approx. 50cm/21in and stitched it by hand onto the ready fabric pillowcase in the same size. The pattern is fully adaptable, and you can use the same stitch pattern for the project in any width and length. Saying that, I mean it will also make a great textured blanket.

For one square I used around 2.5 balls of Scheepjes Scrumptious yarn, so for two sides (if you wish to make your pillow double-sided), you will need 5 balls of this yarn. Of course, you choose a different DK yarn, your yardages will be different.
You will find Scrumptious yarn in your nearest local Scheepjes shop, or via online retailers: Wool Warehouse* (UK&worldwide), Carosatelier* (NL&Europe), Taemombo* (US&Canada).
|
|
Ceiling in Sagrada Familia (Barcelona) |
If you are participating in the MAL already, the new file has been added to your Ravelry library (please, refresh it). And if you would like to join now, you will find Geometry & Texture MAL listing HERE. You will only pay once, and will receive all 3 patterns (the last pattern will be released in two weeks).
UPDATE: Gaudi pillow is now available HERE on Etsy.
|
|
Rödön Pillow
by Martin Up North |
Make sure to check Martin’s pattern pack on Ravelry HERE, too. Next week, he will reveal his next mystery project. And I am quite sure you will like it 😊 I was lucky to get an early sneak peek, so I might show you my progress next Friday, on the day of his release. I will share my picture in Facebook group HERE, where we are officially hosting our make-a-long together with Martin.
So, see you next Friday!
Welcome to the PART 2 of the small Like a Kelim pillow make-a-long. Today we will be adding the first mosaic border around the central square which was completed last week. The border consists of the four stripes, each with the same stitch pattern but different colors. For exact placement of the colors, please check the color key. It was published last week together with the first part of the pattern.

If you prefer to have complete written instructions together with charts, pattern notes and photo-tutorial, then you can purchase a ready-to-print pdf file for a small fee on Ravelry HERE and Etsy HERE.
First Mosaic Border
Each of four Stripes is worked with new color for A and B (see color key).
Stripe 1
Row 1 – WS: With WS facing, attach Yarn A with ss in the corner sp of the central square, ch1 (does not count as a st – here and throughout), 1sc in same sp, 43sc along the side in FL, 1sc in next corner sp, ch14, ch1 changing to Yarn B, turn – 45 sc and 15 ch

Row 2 – RS: With Yarn B, treating every ch as a st, 1sc in second ch from hook, ch2, sk 2 ch, 1sc, [ch3, sk 3 sts (treating very ch as a st), 1sc] to 3 last sts, ch2, sk 2 sts, 1sc to end, turn


Row 3 – WS: Ch1, 1sc, ch2, sk sp, 1sc, [ch3, sk sp, 1sc] to last sp and sc, ch2, sk sp, 1sc to end changing back to Yarn A (make sure float does not pull along the edge), turn

Row 4 – RS: With Yarn A, 1sc, 1mdc in each of 2 skipped ch below, [ch1, sk 1 st, 3mdc] x13, ch1, sk 1 st, 2mdc, 1sc to end, turn

Row 5: Ch1, 3sc, [ch1, sk sp, 3sc] to end changing to Yarn B in last st, turn
Row 6: With Yarn B, ch1, 1sc, [ch1, sk 1 st, 1sc, 1mdc, 1sc] to last 2 sts, ch1, sk 1 st, 1sc to end, turn

Row 7: Ch1, 1sc, [ch1, sk sp, 3sc] to last sp and sc, ch1, sk sp, 1sc to end changing to Yarn A, turn
Row 8: With Yarn A, ch1, 1sc, 1mdc, [ch1, sk 1 st, 1sc, ch1, sk 1 st, 1mdc] to last st, 1sc to end, turn

Row 9: Ch1, 2sc, [ch1, sk sp, 1sc] to last st, 1sc to end changing to Yarn B, turn
Row 10: With Yarn B, ch1, 2sc, 1mdc, [ch1, sk 1 st, 1mdc, 1sc, 1mdc] to end working 1sc instead of last mdc, turn

Row 11: Ch1, 3sc, [ch1, sk sp, 3sc] to end changing to Yarn A in last st, turn
Row 12: With Yarn A. Rep Row 6

Row 13: Rep Row 7 changing to Yarn B in last st
Row 14: With Yarn B, ch1, 1sc, 1mdc, [ch3, sk 3 sts, 1mdc] to last st, 1sc to end, turn

Row 15: Ch1, 2sc, [ch3, sk sp, 1sc] to last st, 1sc to end changing to Yarn A (cut Yarn B), turn
Row 16: With Yarn A, ch1, 2sc, [3mdc, 1sc] to last st, 1sc to end. Fasten off.

Stripe 2
Row 1 – WS: With WS facing (previously completed stripe is on the left side for righties (right side for lefties), attach Yarn A with ss in the corner sp of the central square, ch1 (does not count as a st – here and throughout), 1sc in same sp, 43sc along the square’s side in FL, 1sc in next corner sp, 14 sc evenly along the short edge of Stripe 1 changing to Yarn B in last st, turn – 59 sc

Rep Rows 2-16 from Stripe 1
Stripe 3: Rep instructions for Stripe 2
Stripe 4: Rep instructions for Stripe 2 joining it with the “hanging” edge of Stripe 1 as-you-go as foll:
After completing Row 2, work ss in first ch on the hanging edge, turn and continue with Row 3 on WS. After rows 4, 6, 8, 10, 12 and 14, ss in next two ch on the hanging edge, turn and continue with next row on WS. Join Row 16 with ss in last ch on the hanging edge.

And here is the chart for you to follow if you prefer it better than written instructions.

Purchase a ready-to-print copy of the pattern with ALL parts on Ravelry and Etsy.
See you next week!


Add this pattern to your Ravelry Queue
Roman labyrinth was well known and widespread throughout the Roman Empire, and many examples have survived from this period, especially in the form of floor mosaics. Nowadays Roman Labyrinth is used in contemporary interior design. I like these clear geometric lines, and I think it can suit well modern interiors: both as rug and as a pillow.
Roman Labyrinth pattern is on SALE right now through Monday, April 30th, 2018 both on Ravelry HERE and Etsy HERE. It is offered with 25% discount which is already applied in price and no coupon codes needed.
Using Roman Labyrinth pattern you can make either a pillow or an area rug. The pattern can be recreated with just two shades of yarn. Or, if you like the colors, you can choose a new shade for every of five sections and combine them with main color. The colorful version will become a great accessory for your kid’s room. My sun can’t stop playing with his new pillow. And he claimed it as his own from the very first moment when I only created the chart.


Roman Labyrinth pattern contains row-by-row written instructions, the chart (with explanation of how to read it) and step-by-step pictures to guide you through every step and row. A print friendly version of the pattern with no pictures is also available for download. There is also a tutorial about how to use multiple colors to create the same pillow as mine.
The pattern uses overlay crochet with front post stitches on the right side. You will only use one color for each two rows, and the yarn is not broken but is carried along the edge up to the next rows. Easy and almost no ends to weave in.

For this project you can use absolutely any yarn in solid colors. I would recommend something heavy and bulky for the rug. I have wanted to try Lopi yarn since long ago, and rug seemed like the perfect project for that. I chose Alafosslopi yarn which is bulky weight, and used two shades for central labyrinth panel, and then added four different colors for the border. My rug turned out thick and warm. Just a perfect feel for my feet.
Lopi yarn is available via Wool Warehouse HERE* (UK with international shipping) if you prefer to shop online.


And for my pillow I used leftovers of Colour Crafter yarn by Scheepjes in bright and happy colors together with 4.5mm crochet hook*. I felt lazy to crochet back side for my pillow, so I sewed crocheted square onto ready fabric pillowcase bought in IKEA. Here is a video tutorial on how I usually do this.
You can purchase Colour Crafter yarn in your local Scheepjes shops, or via online retailers*:
Wool Warehouse* (UK, international shipping)
Black Sheep Wools* (UK, international shipping)
Caro’s Atelier* (NL and Europe)

In my opinion Roman Labyrinth pattern is quite a relaxing project, and with large hook your new rug will be born in no time. You can skip written instructions and follow the chart if you are comfortable with just visual support. I will be very happy to see your finished creations! Please, share them with me in my Ravelry group HERE or Facebook group HERE. And please use the tag #romanlabyrinthrug on social media.
Brief Facts about Roman Labyrinth pattern:
- Level: Intermediate: tapestry crochet, clusters and front post stitches
- Language: English (US terms)
- Pattern contains complete written instructions, a chart and heavy photo-tutorial. Print friendly version of the pattern without pictures is also available for download.
- Roman Labyrinth pattern is available on Ravelry HERE and Etsy HERE and is offered with 20% discount through Monday, April 30th, 2018. The discount is already applied in the price you see, and no coupon codes needed.